
In 2016 I designed and built my own carbon fibre canoe. It was tough, educational and full of mistakes. It took a lot longer than I thought it would, but here’s my account of what I did and how. The final weight fully outfitted is 22kg.
Design
First I decided what I wanted the boat to do. The first answer was obvious: everything! I wanted to take on big waves, to go fast, to turn quickly, to track straight, to be stable and to have a low profile.
A canoe can simply never be a master of all – that’s a necessary realisation for every boat designer. To tackle big waves you must present a large surface to the wind that makes them. To track straight you must sacrifice turning ability. To go fast you must sacrifice stability. Accepting this made my life a lot easier – many of my decisions would be made for me.


Building The Mould
To construct the boat I broadly followed James Moran’s method contained in his fantastic book “Building Your Kevlar Canoe”. Published in 1993 this book needs a bit of updating for modern materials and prices but when read carefully provides excellent guidance. Find a copy if you can.
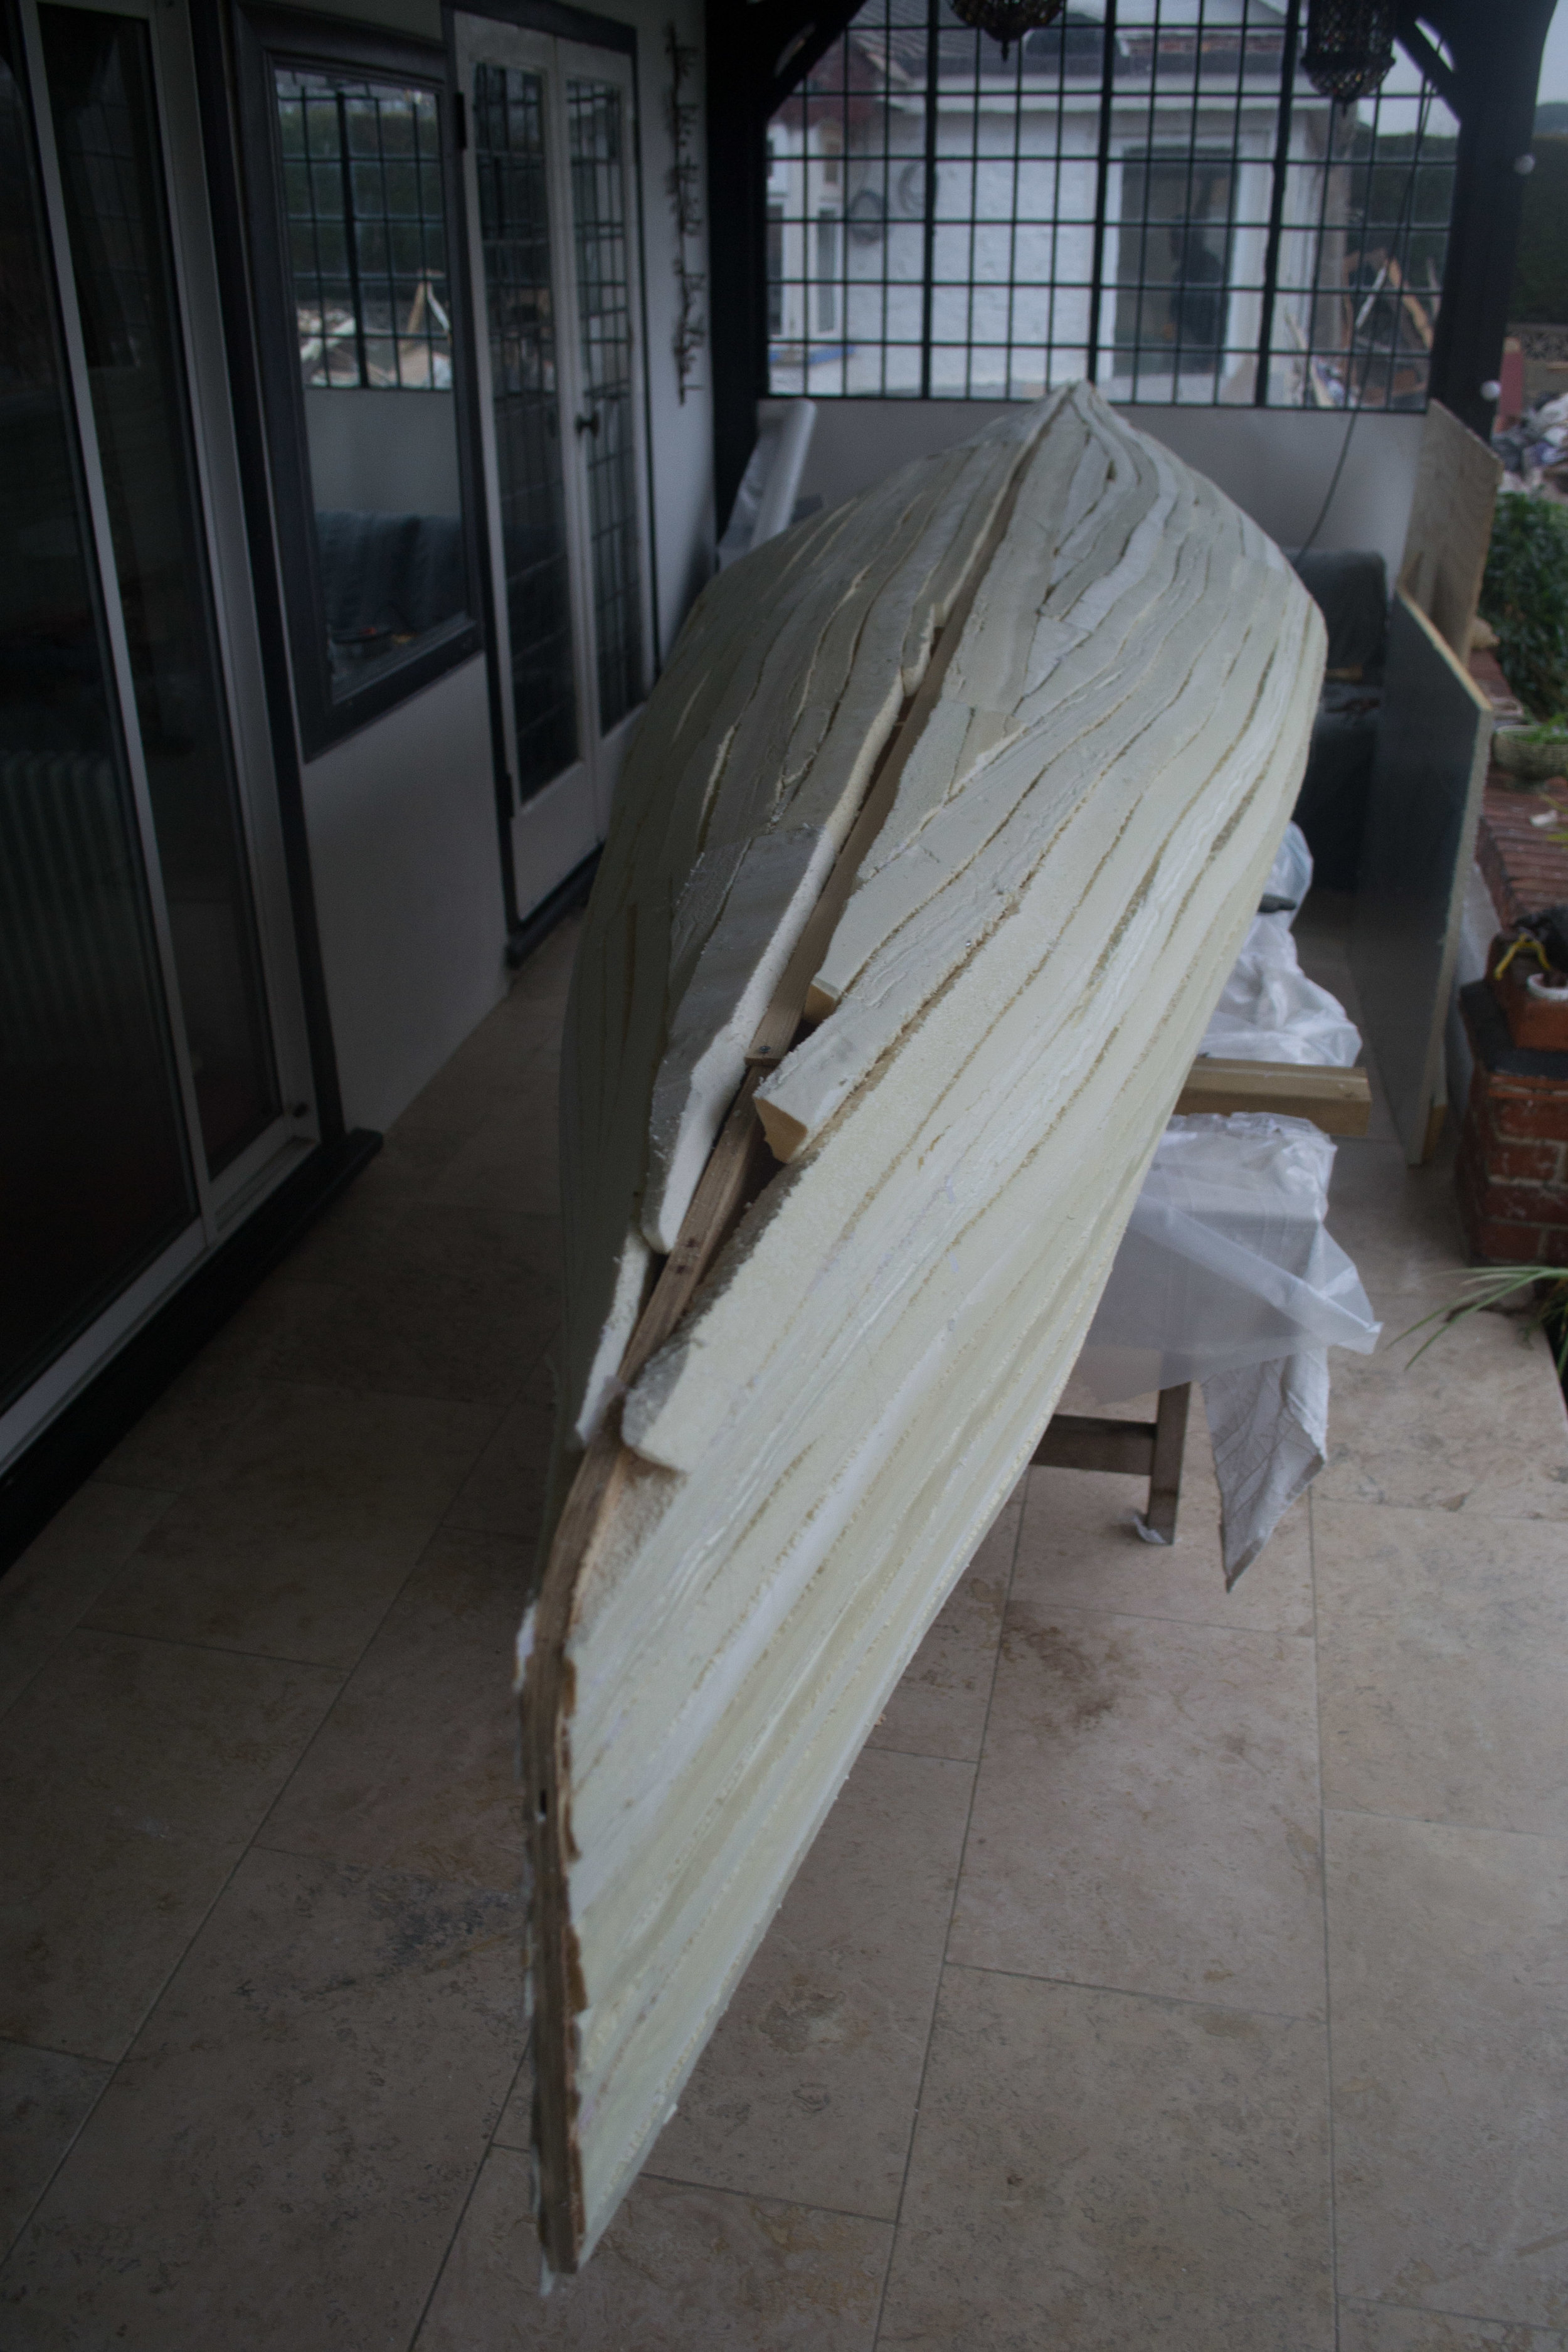
The gist of it is to make a mould (or "plug") and then form the actual boat off that shape. Most of the work goes into making the mould and it's really important to get a stiff, smooth shape.
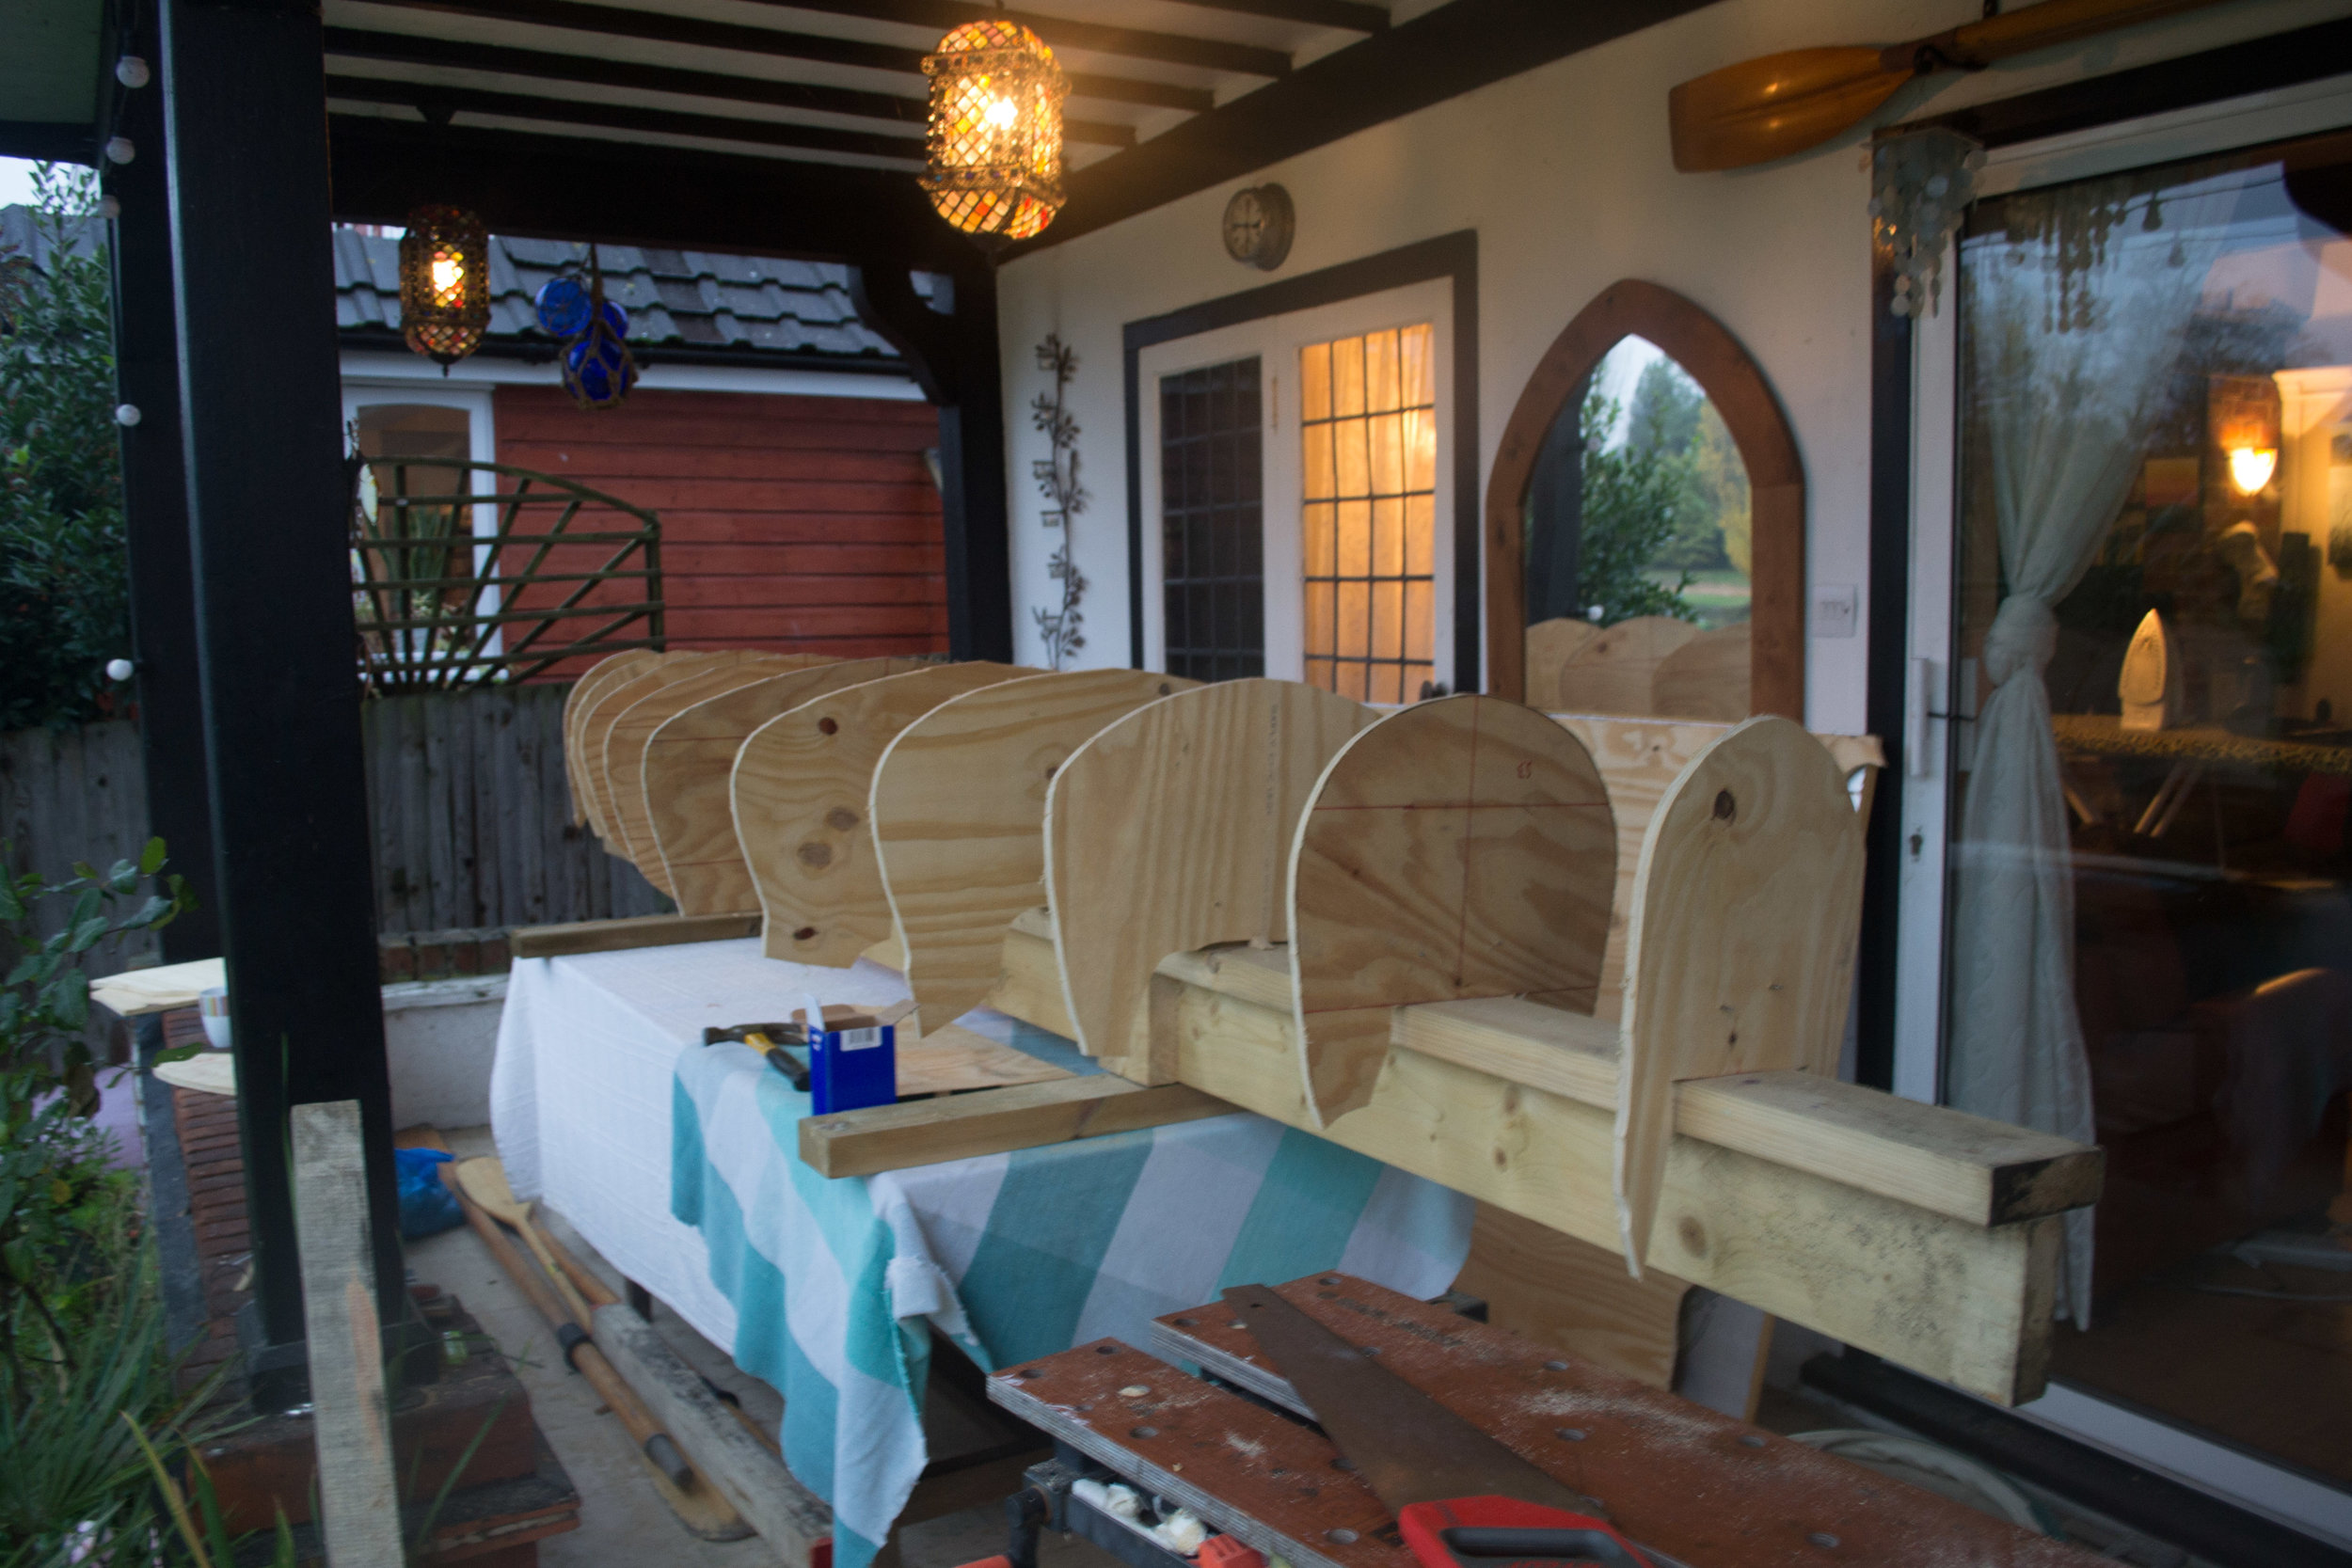
I created 12 cross sections of my 3D shape using a spreadsheet of parameters linked with SolidWorks. I then printed the cross section from my local printers (one A0 and one A1 sheet). I then transferred this to plywood with carbon transfer paper. I cut out the cross sections and mounted them along a plank of stiff wood known as a strongback.
I then linked them up by glueing cellotex foam strips to make a 3d shape. Cellotex is foam insulation board that has foil on both sides. The foil must be stripped off to make the foam strips sufficiently bendy.
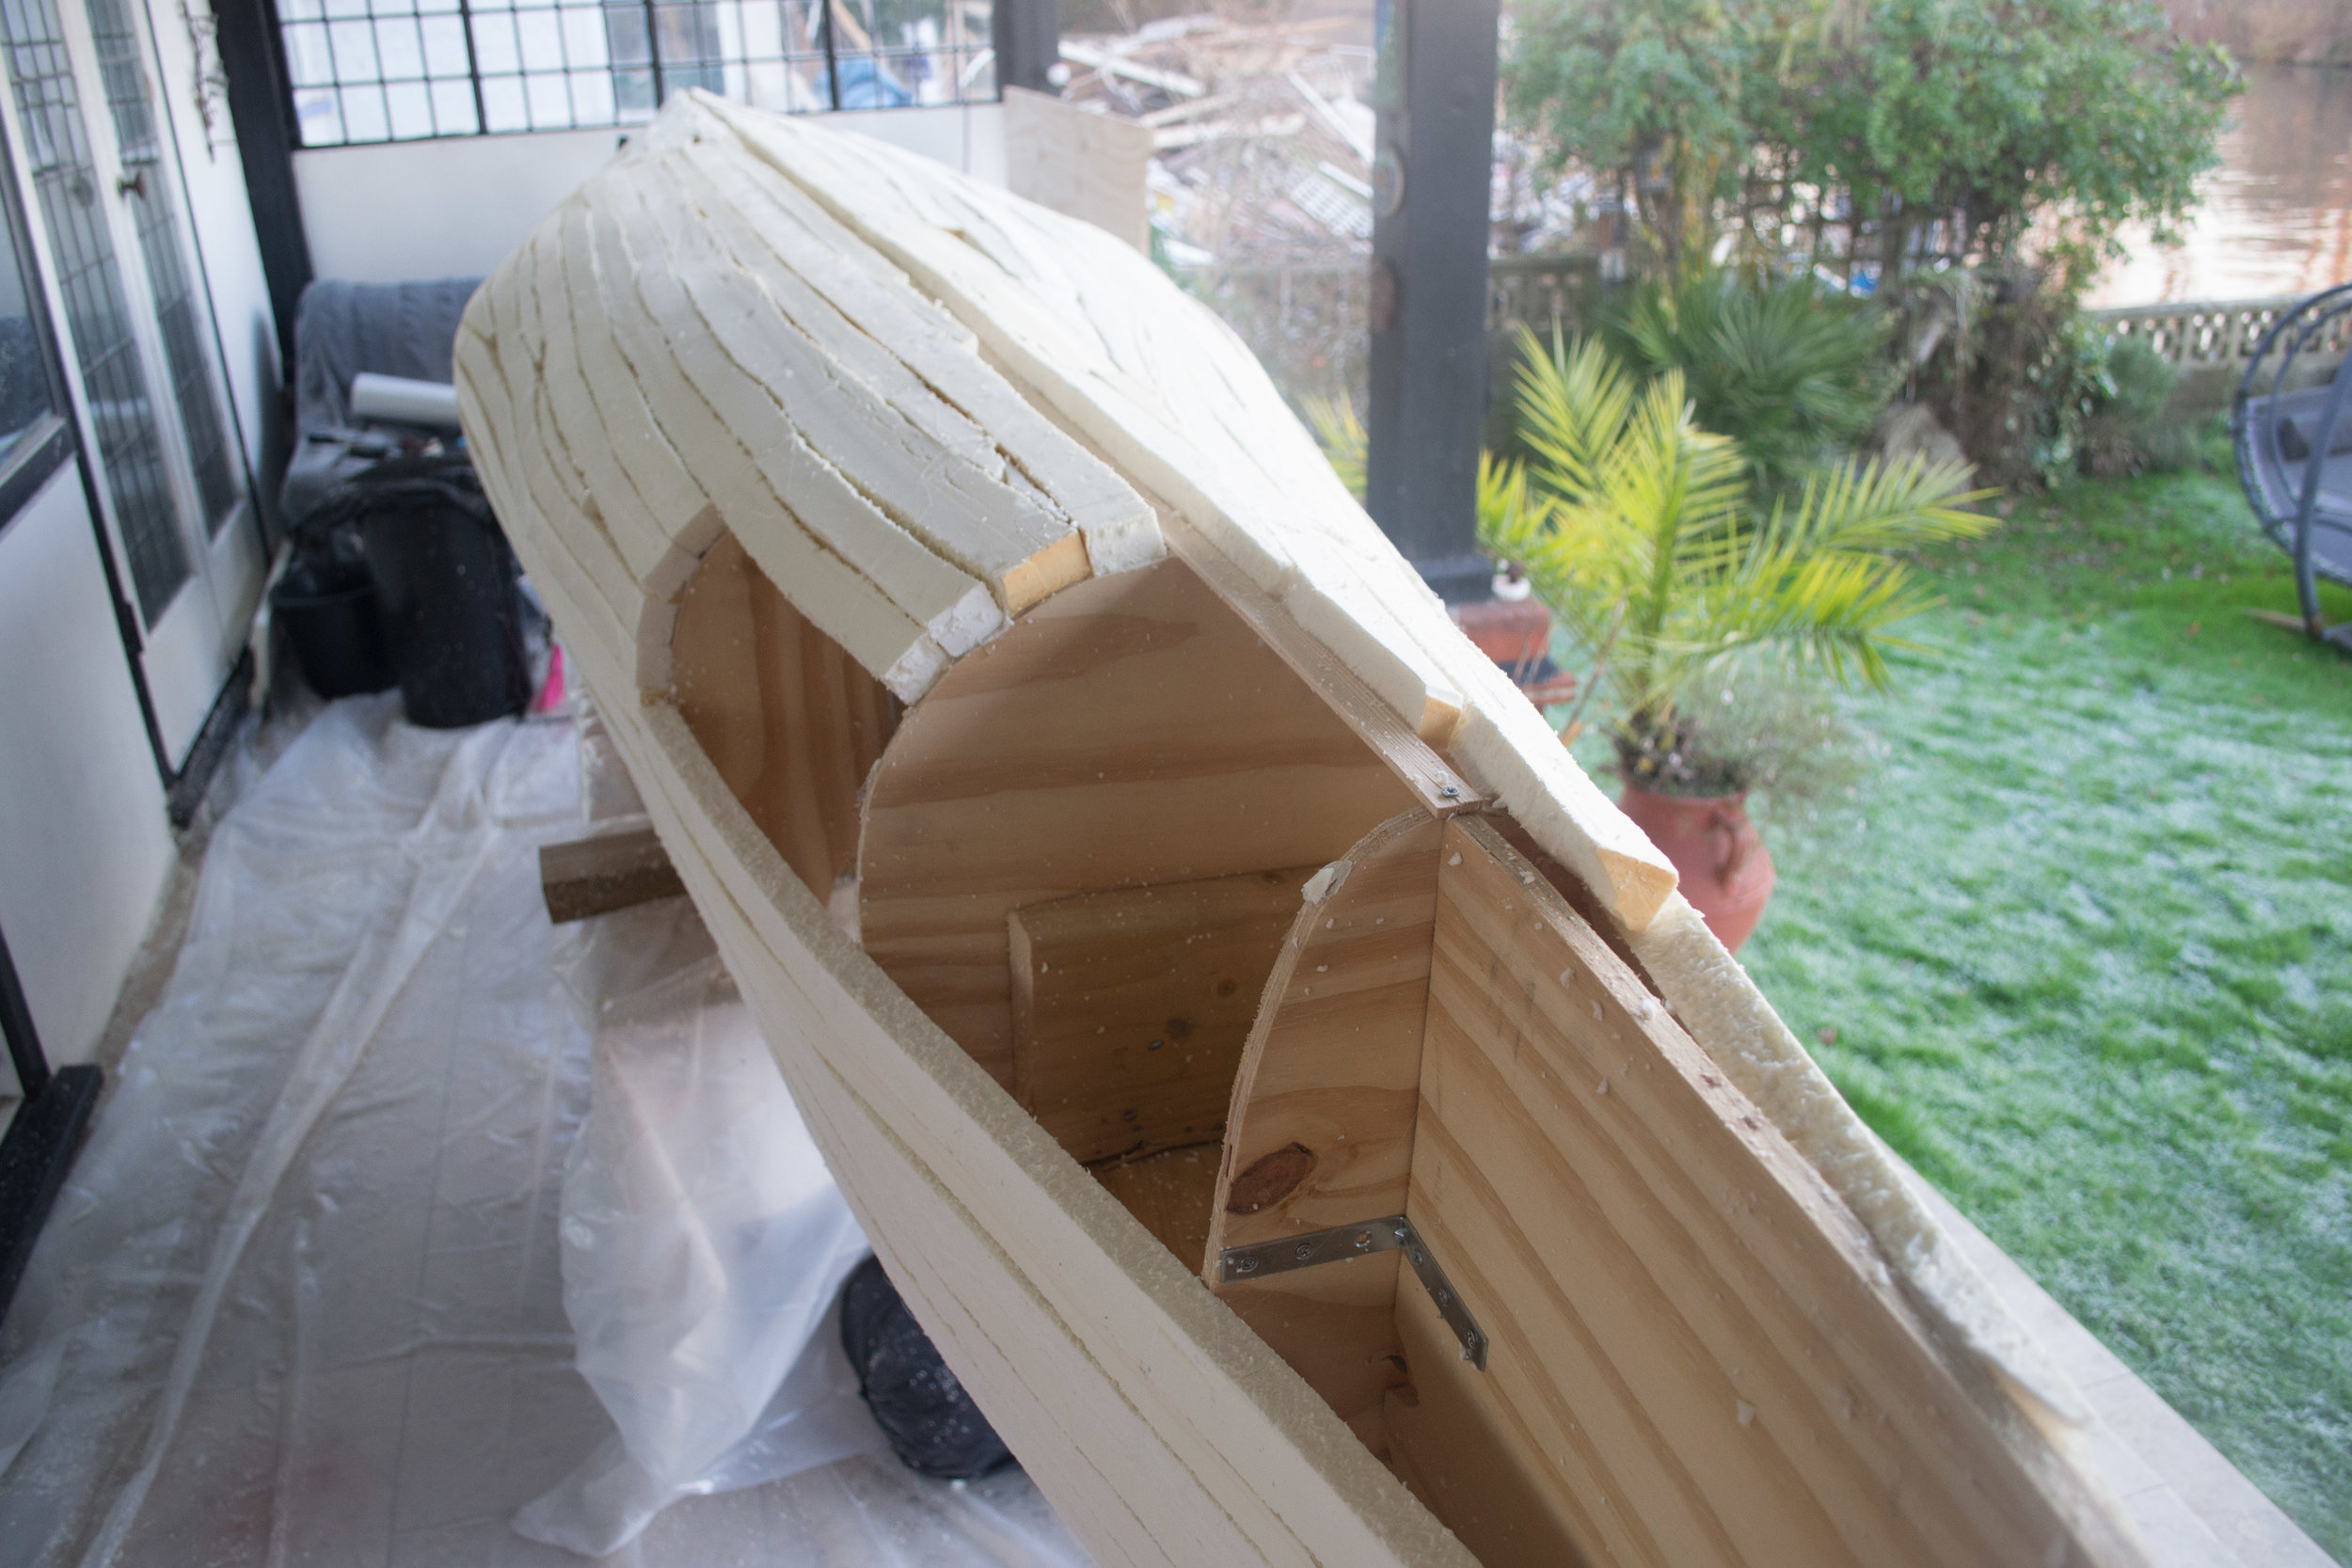
Building the Boat
My boat is built out of carbon fibre rather than Kevlar. Both carbon fibre and Kevlar construction involves fabric that’s impregnated in a hard resin. Carbon is stiffer than Kevlar so makes for a stiffer, more robust boat, but it's easily abraded. To help protect the boat from abrasion I put a layer of diolen on the outside. Diolen can be made to look identical to carbon fiber but its properties are much more like Kevlar - it's a bit floppier but very abrasion resistant. In fact it's so tough in this respect that it caused major issues when the rough edges needed to be sanded!
The combination of a fabric and a resin is called a composite. Composite materials are famously stiff as the forces are mostly carried along the fibres which are strong and flexible, the resin helps it keep its shape. Too little resin and you'll have dry, floppy sections of fabric. Too much resin and the material becomes brittle and the resin will snap well before the composite is fully loaded. Although many modern carbon constructions are made using vacuum pumps I decided to go for a “wet, hand lay up” to keep things simple and cheap. This involves covering the mould in fabric (supplied on long rolls) and painting it thoroughly with epoxy resin.
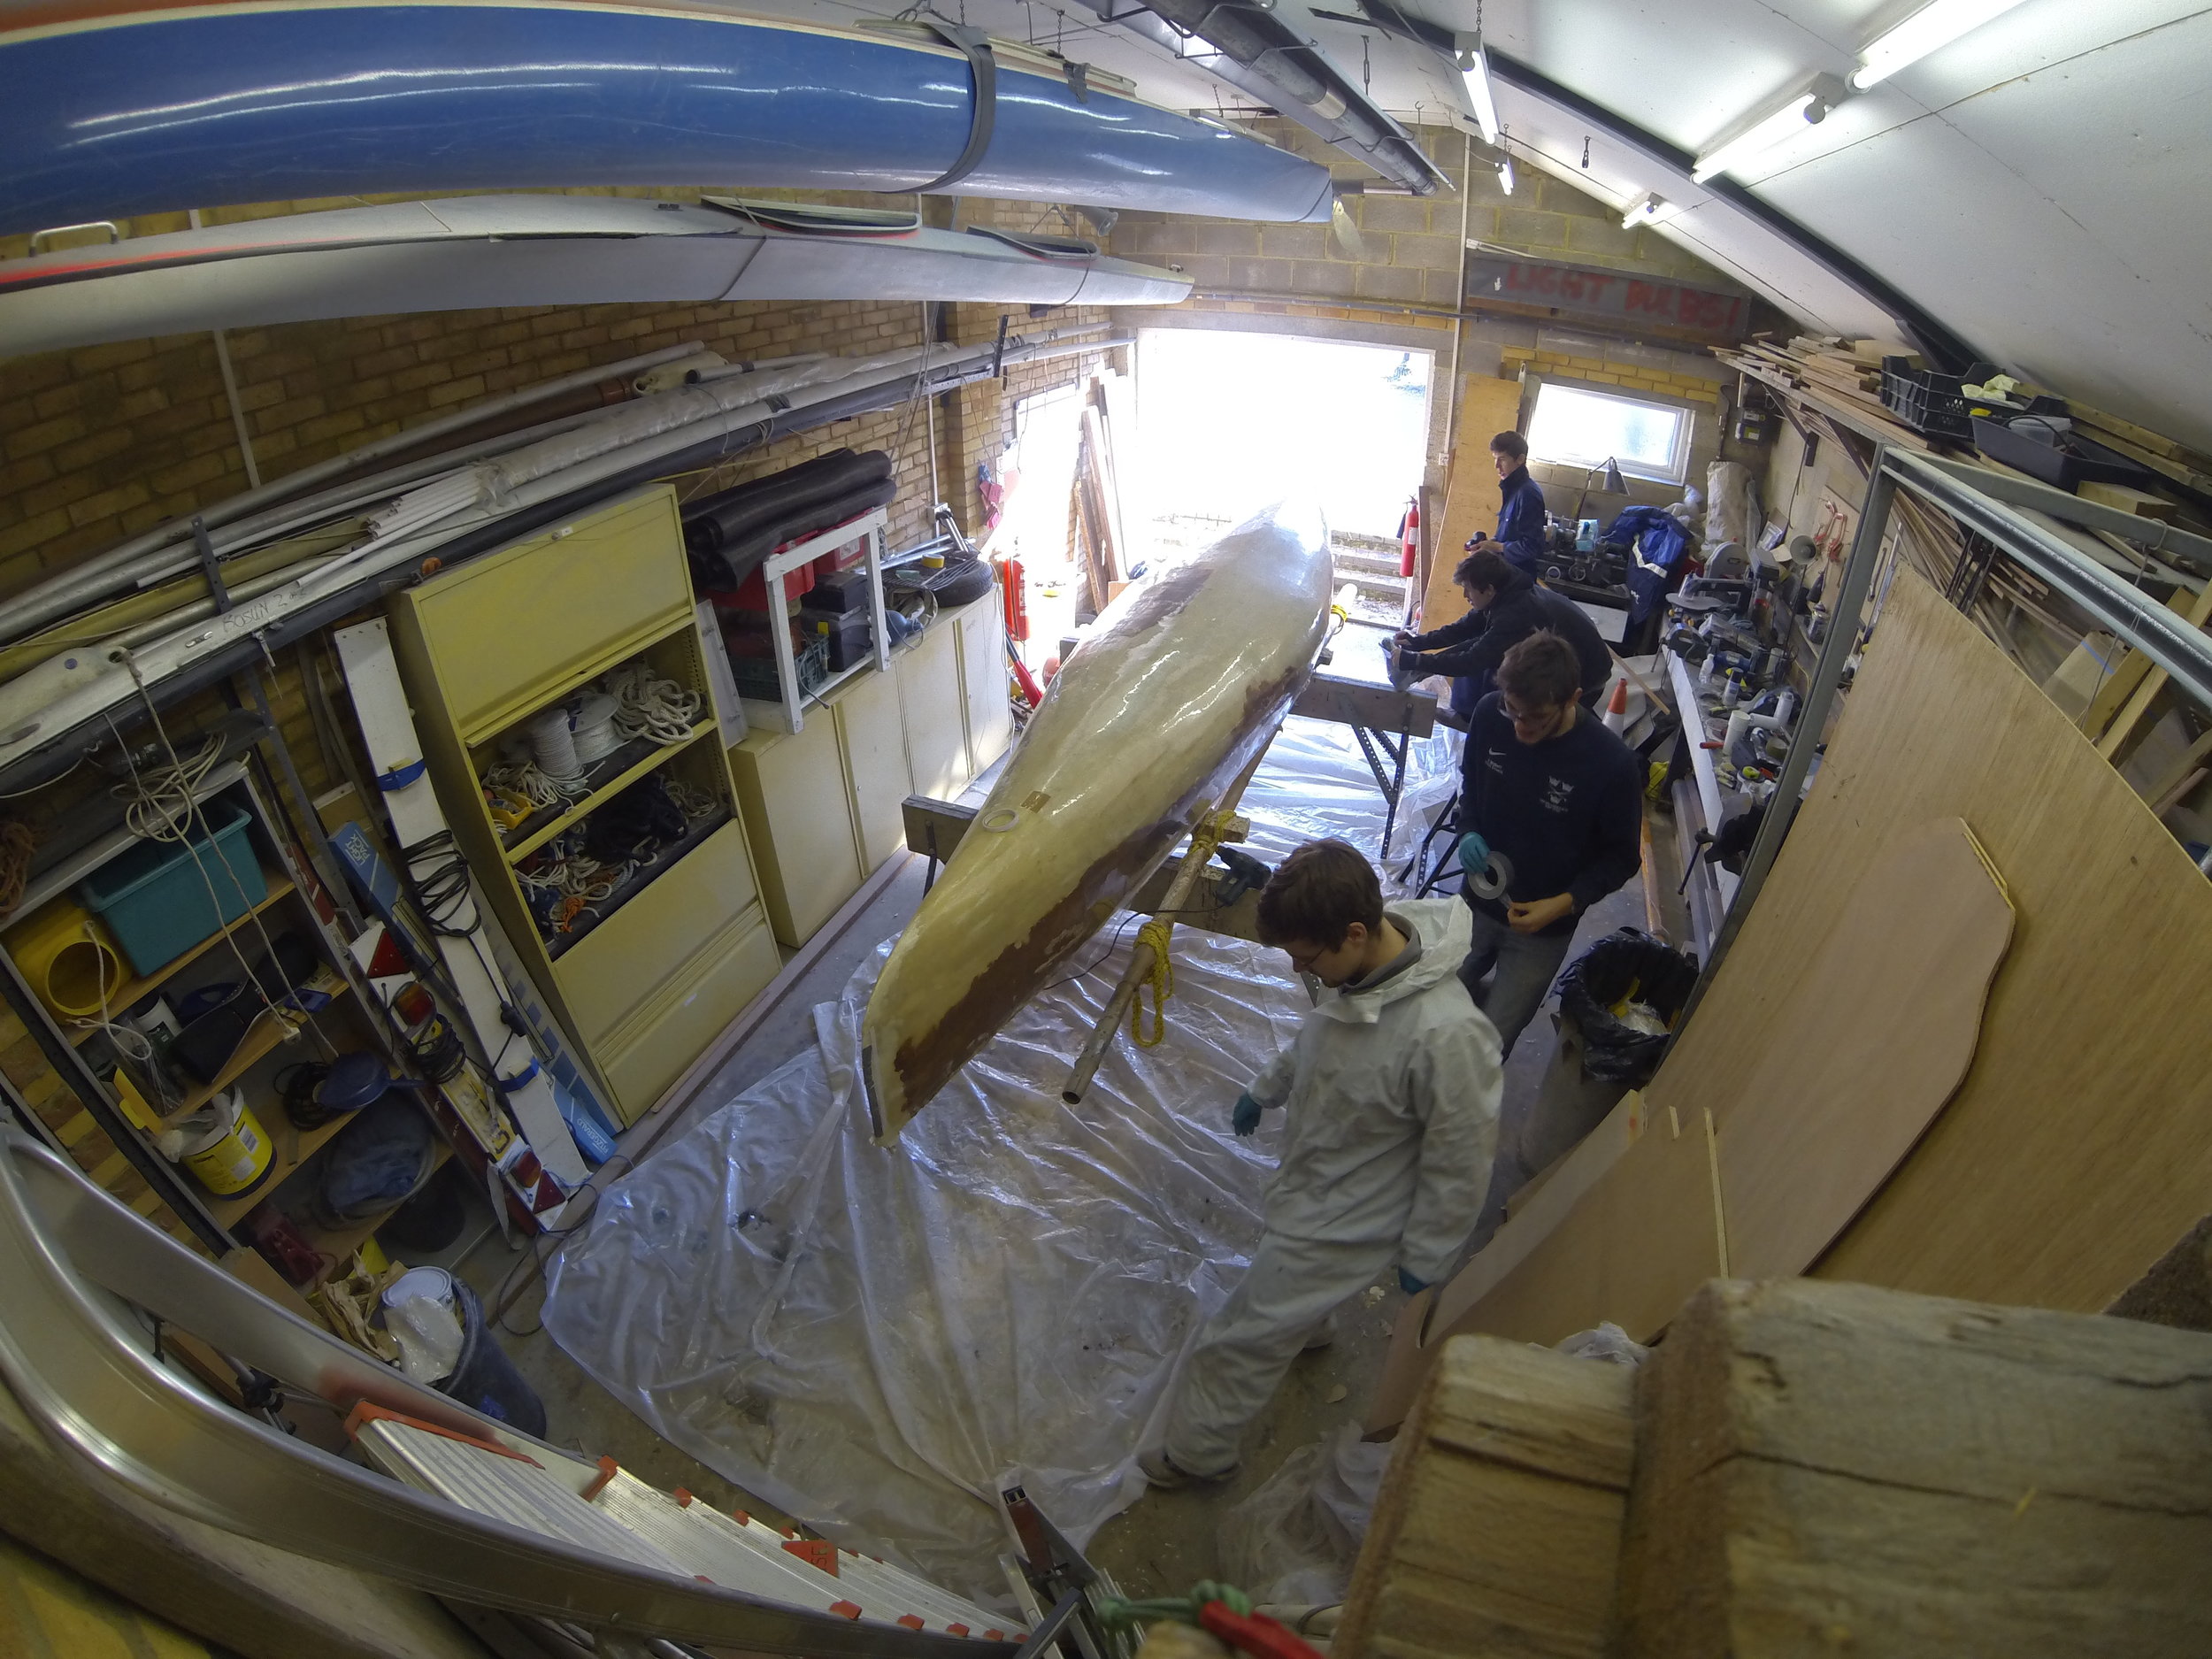
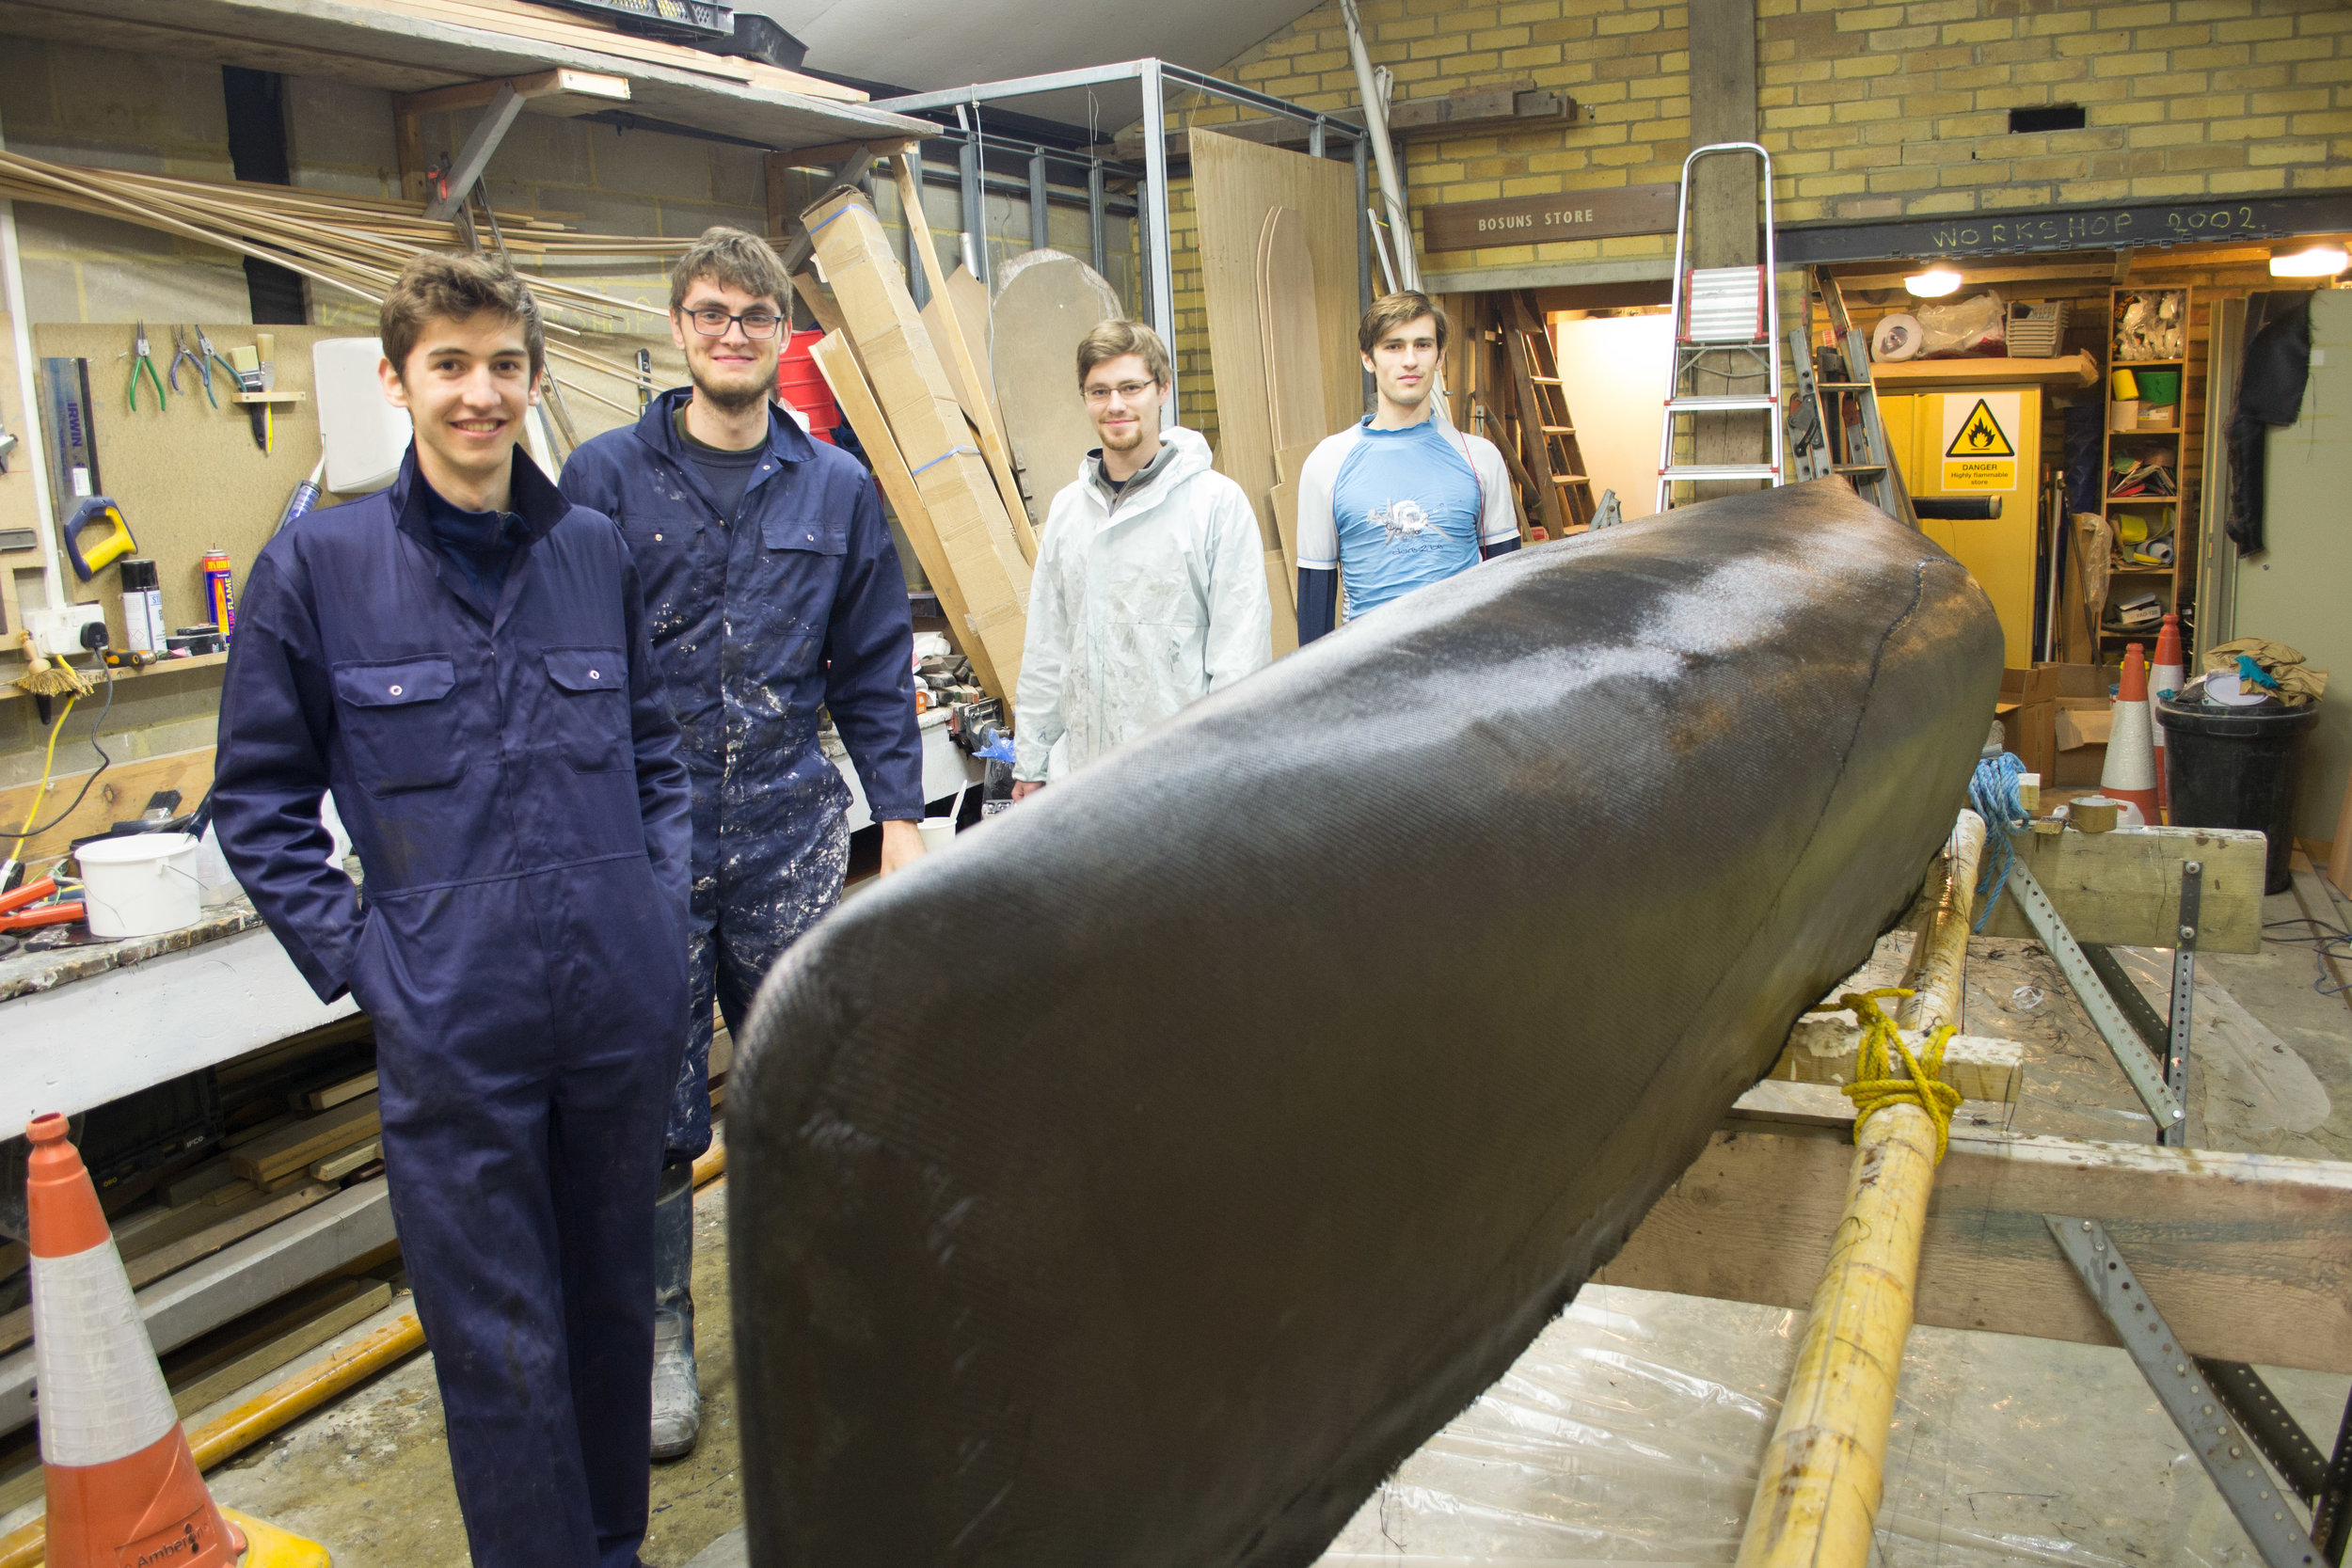
The first thing I did was recruit three capable friends. Two were engineers that I met at university The third addition to the team was an old friend from school who went on to study maths. We used to study and row together and this was a great chance to reconnect after drifting apart (my fault) during university.
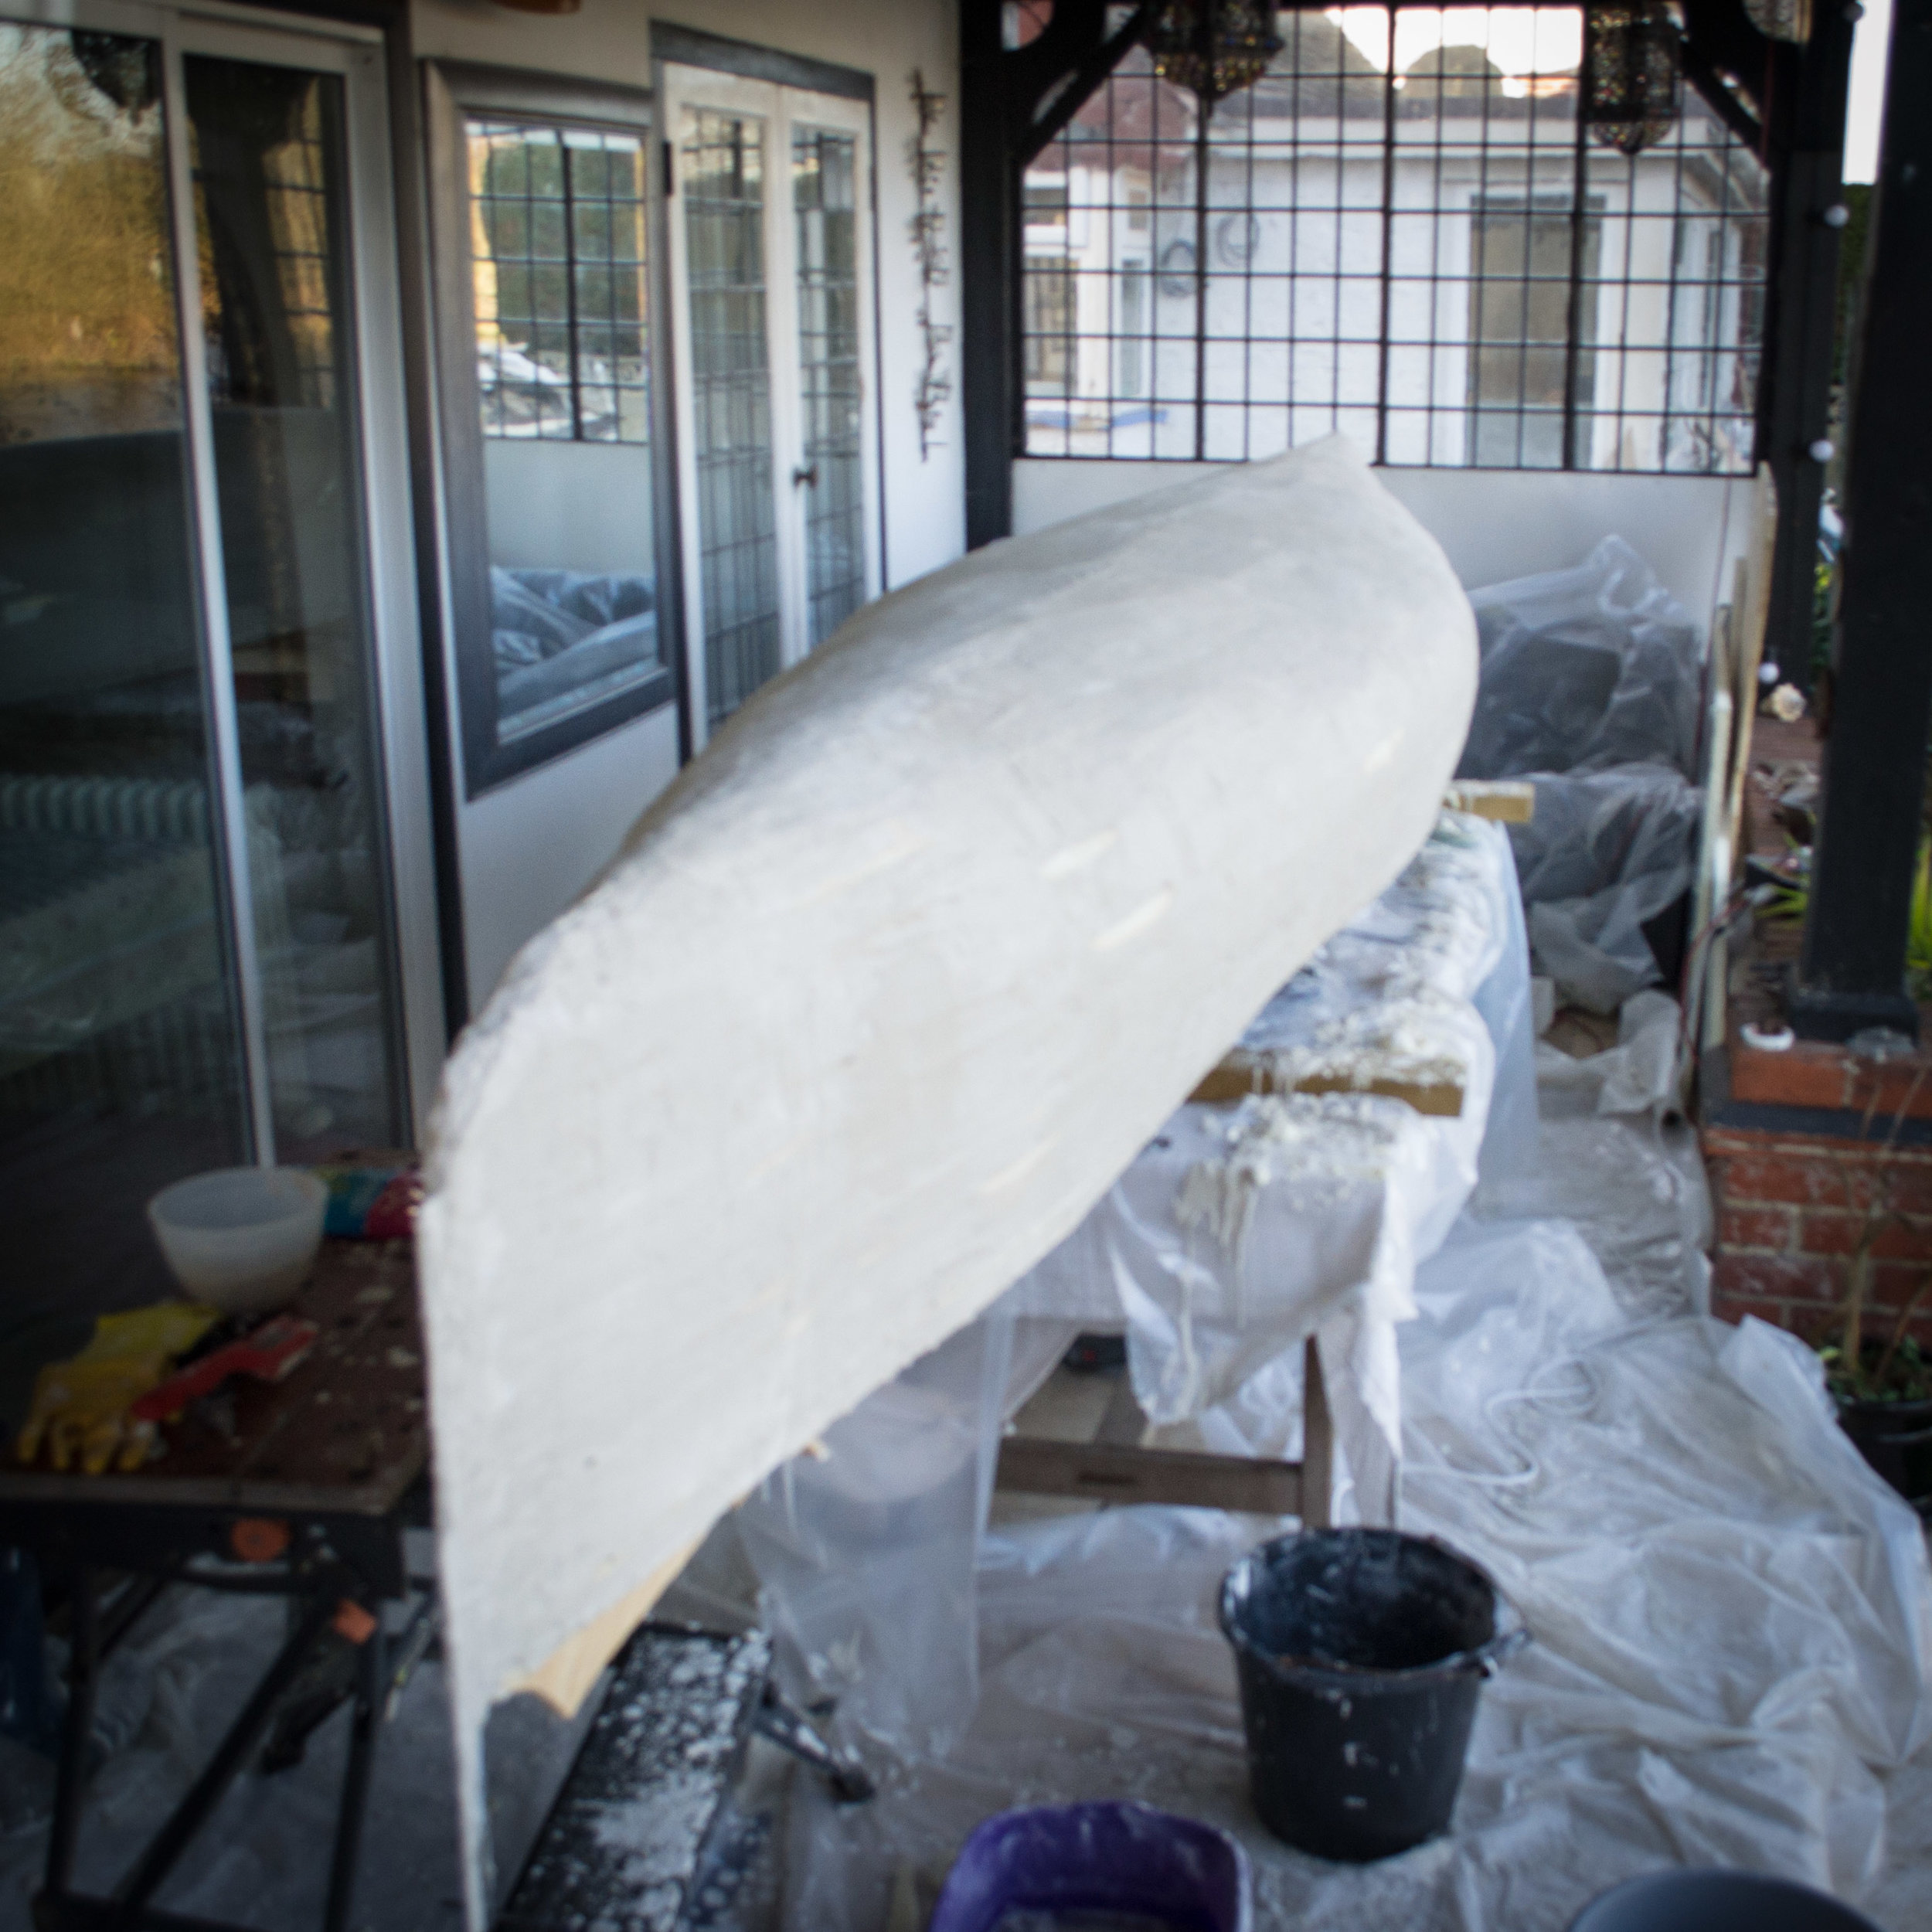
With the brain trust assembled, we covered the plug with shrink wrap. This provided a smooth, detachable surface so the boat would not stick to the mould. I tried initially to coat the mould in a release compound but struggled to do it consistently given the large coverage required. A drawback of the shrink wrap method was that some areas of the mould were very slightly concave. This meant that the plastic shrunk and pulled itself out of contact with the mould. Amazingly this didn’t seem to cause any significant delamination in the end. We shrunk the plastic with a heat gun so it conformed to the shape of the mould with a heat gun. Occasionally we went through it and covered the holes with packing tape – do not do this. The packing tape stuck to the carbon and is now an integral part of the boat.
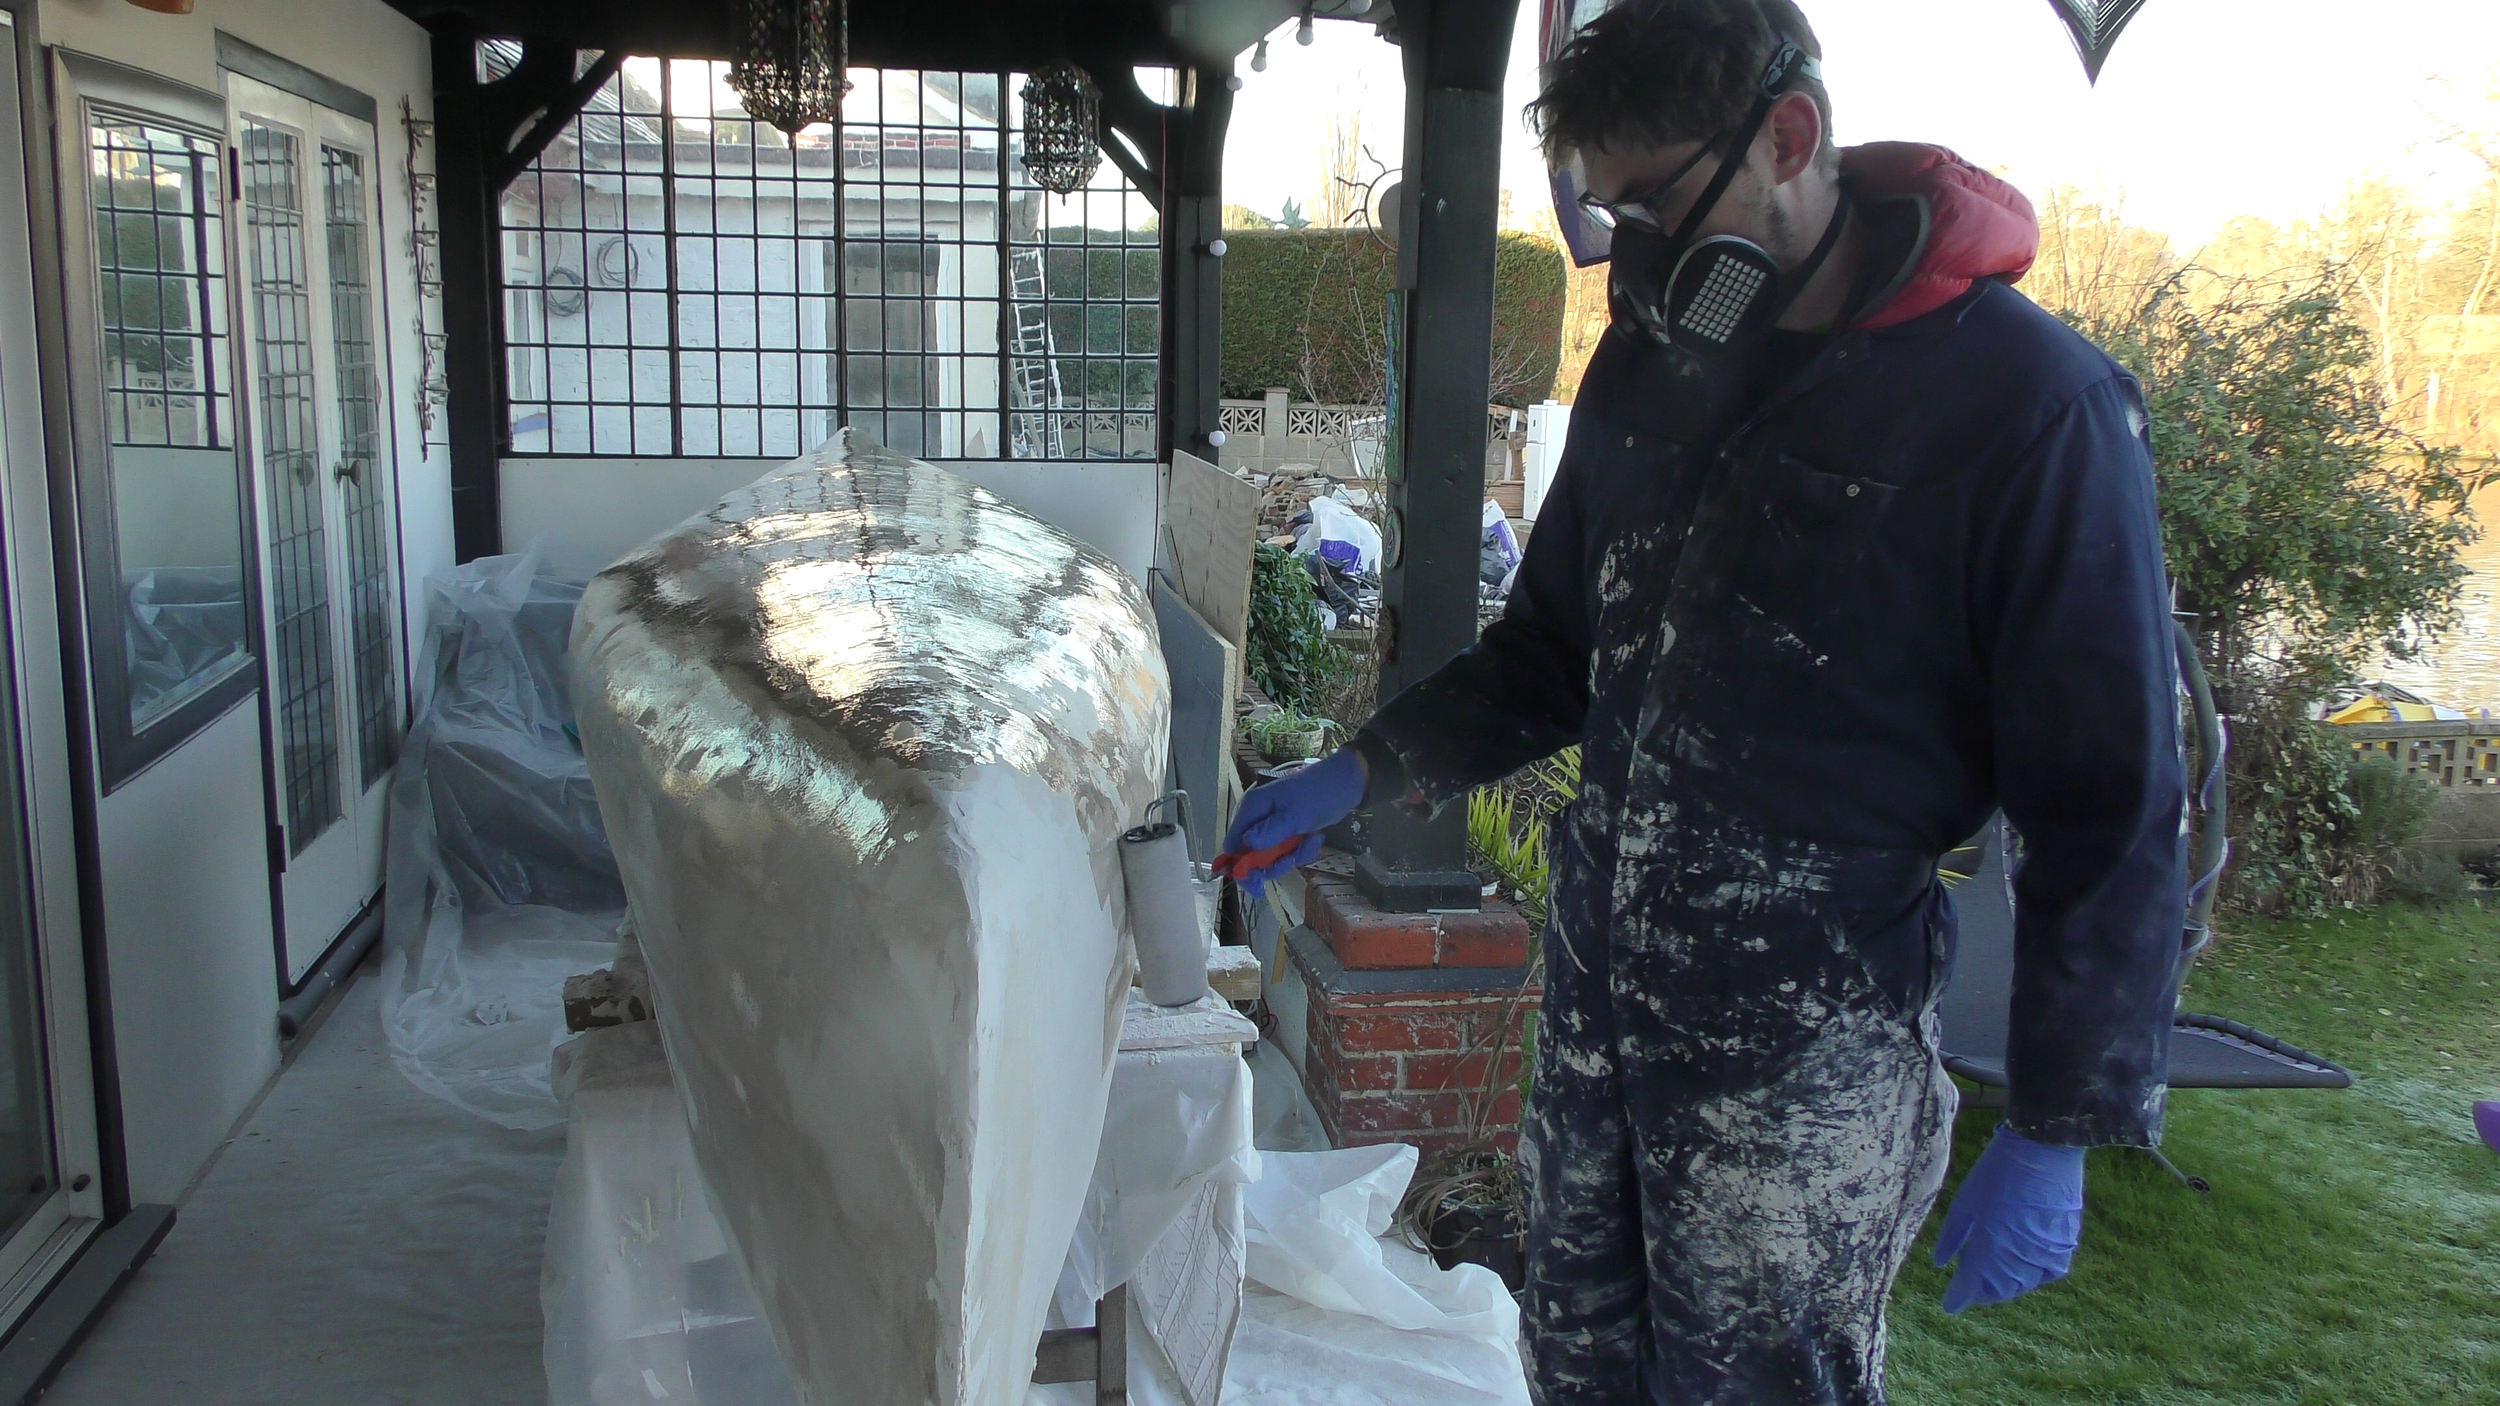
We then covered the shrink wrap in epoxy resin. This helps wet out all sides of the fabric. We then progressively layered on first the carbon fibre (the stiff inner material) and then two layers of diolen (abrasion resistant material with less stiffness). In between each layer we covered it with epoxy using rollers and a brush. We trimmed the fabric round the bottom of the mould so that its weight wouldn’t distort the weave or pull it off the mould.

The Outfitting
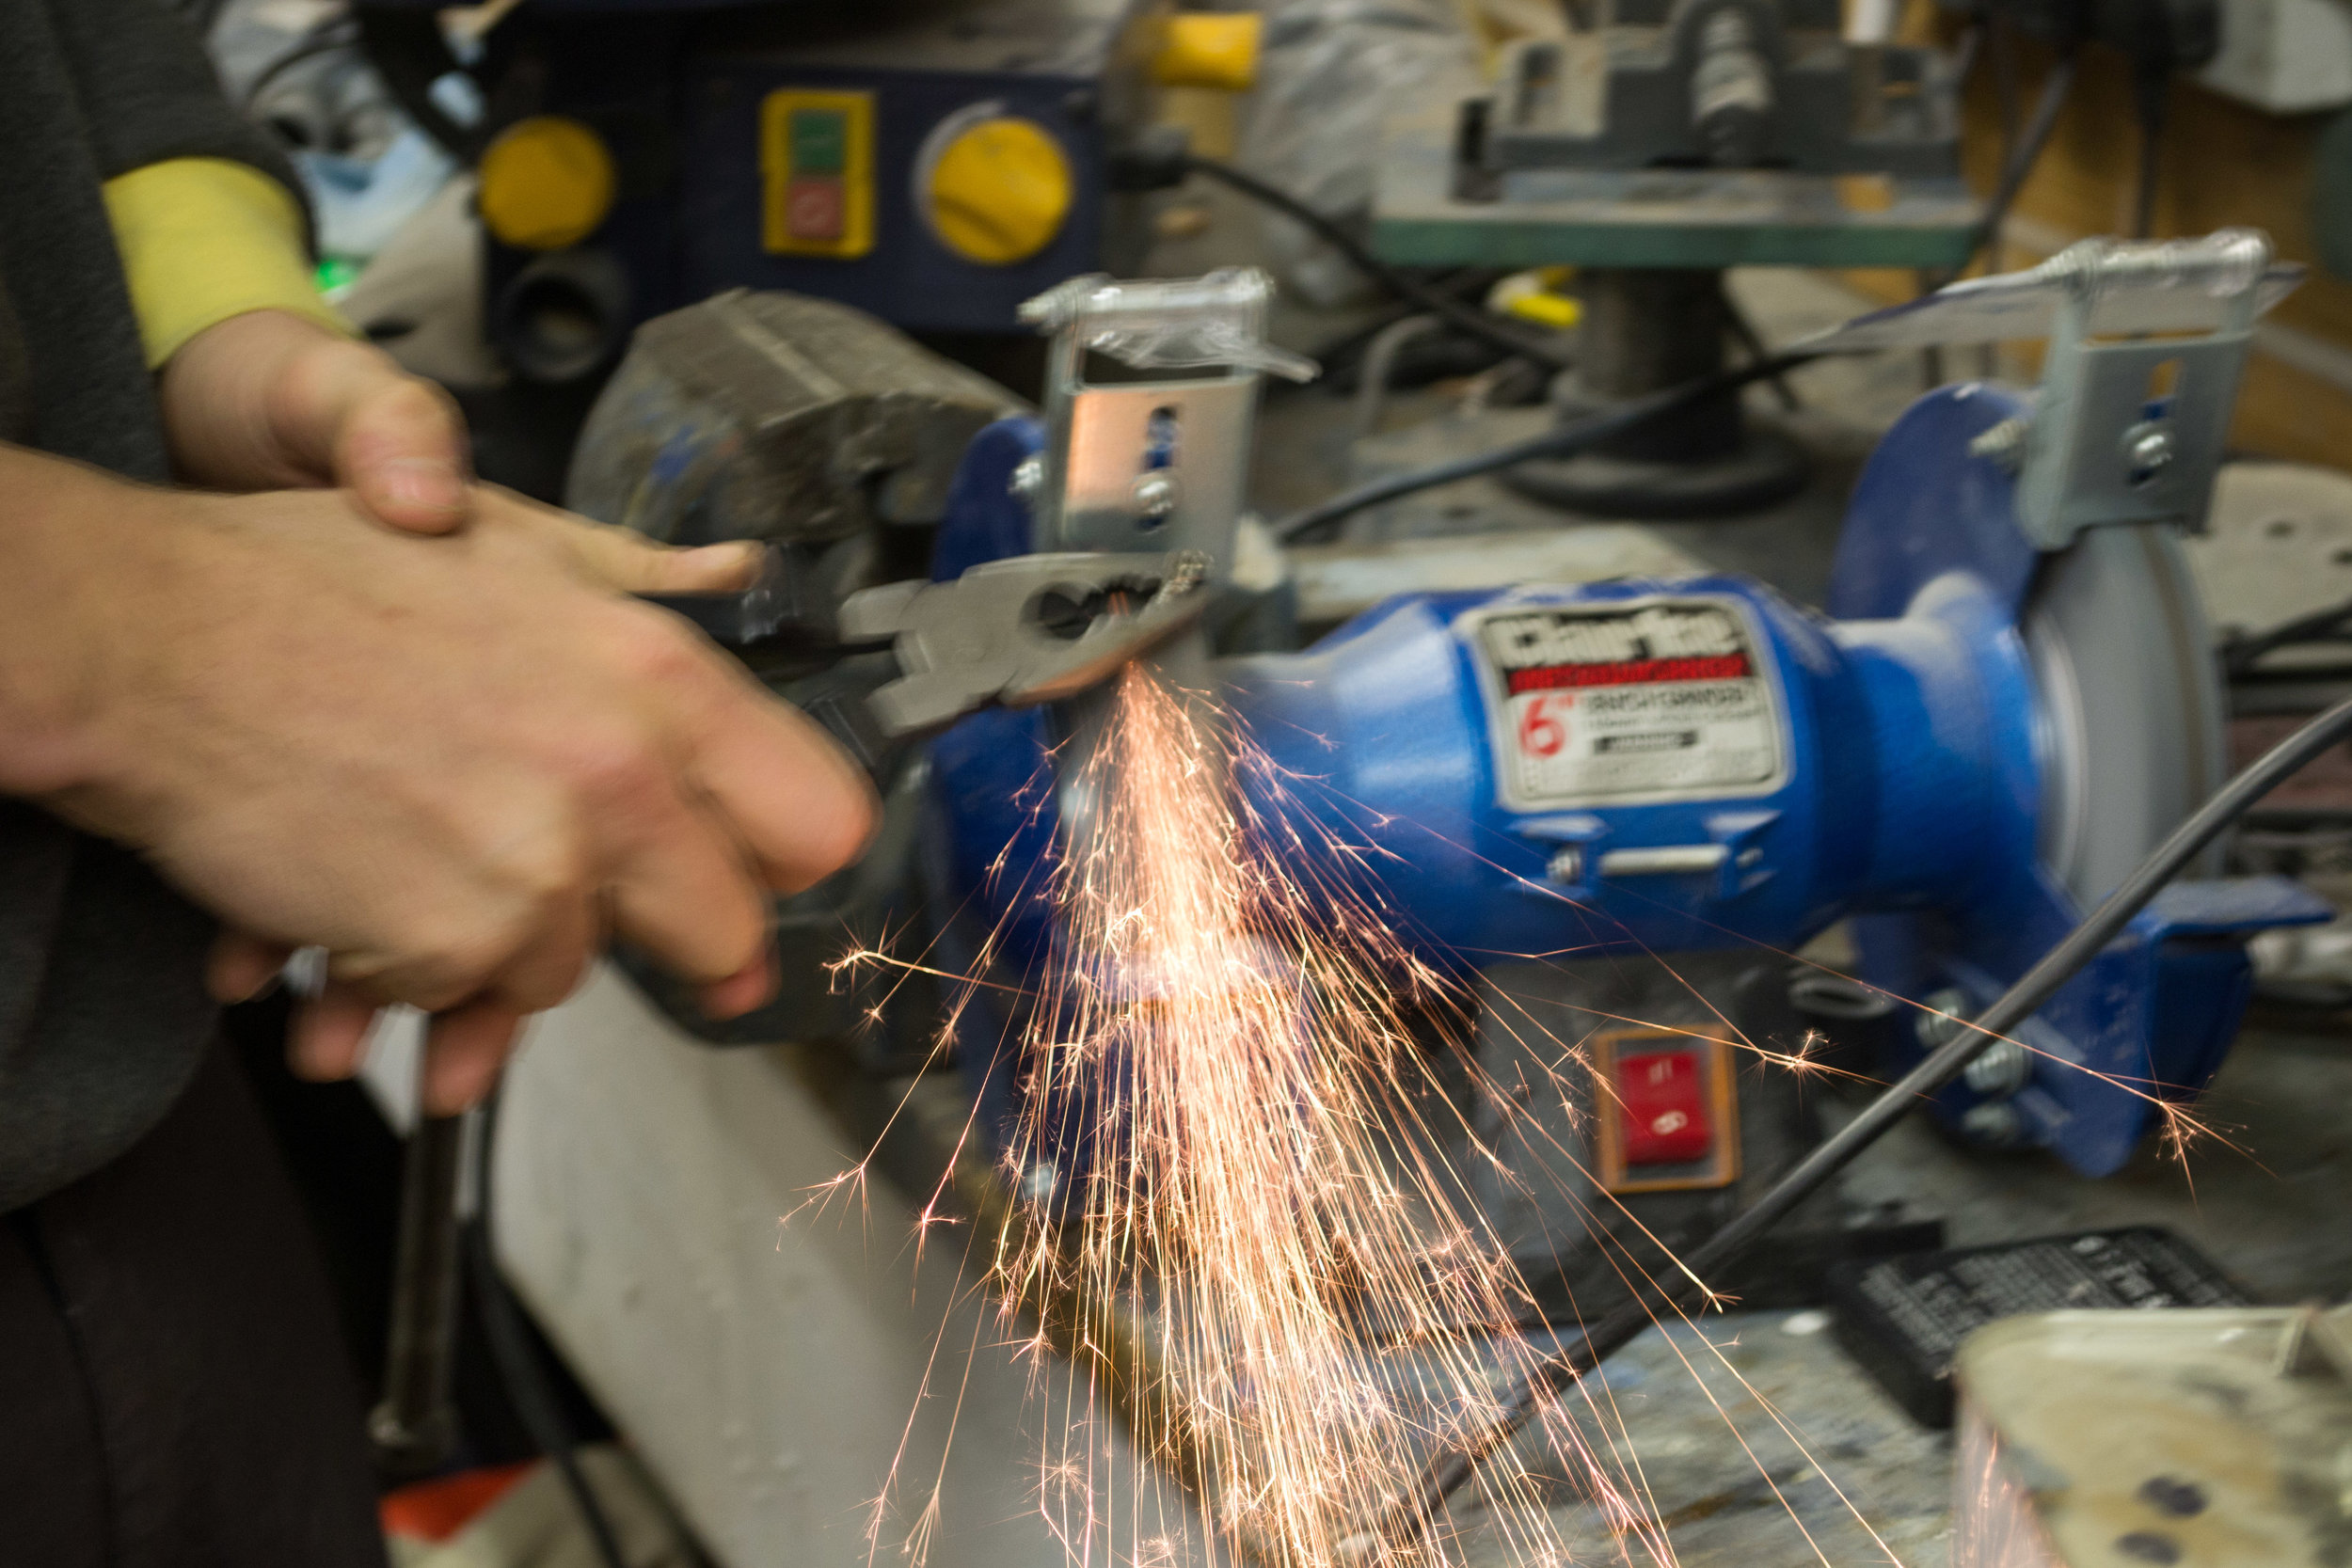
After a long day we finished wetting out the fabric and let it cure for 36 hours. We returned to find it all rock hard. At this point I should have painted on a coat of epoxy to smooth the rough surface. We smashed up the mould and the canoe looked fantastic. I had planned to paint on the clearcoat then, but it became apparent that the canoe couldn’t be turned upside down before it had gunwhales since it was too floppy and ragged around the edge. The next task was fitting the gunwales and trimming the edges.
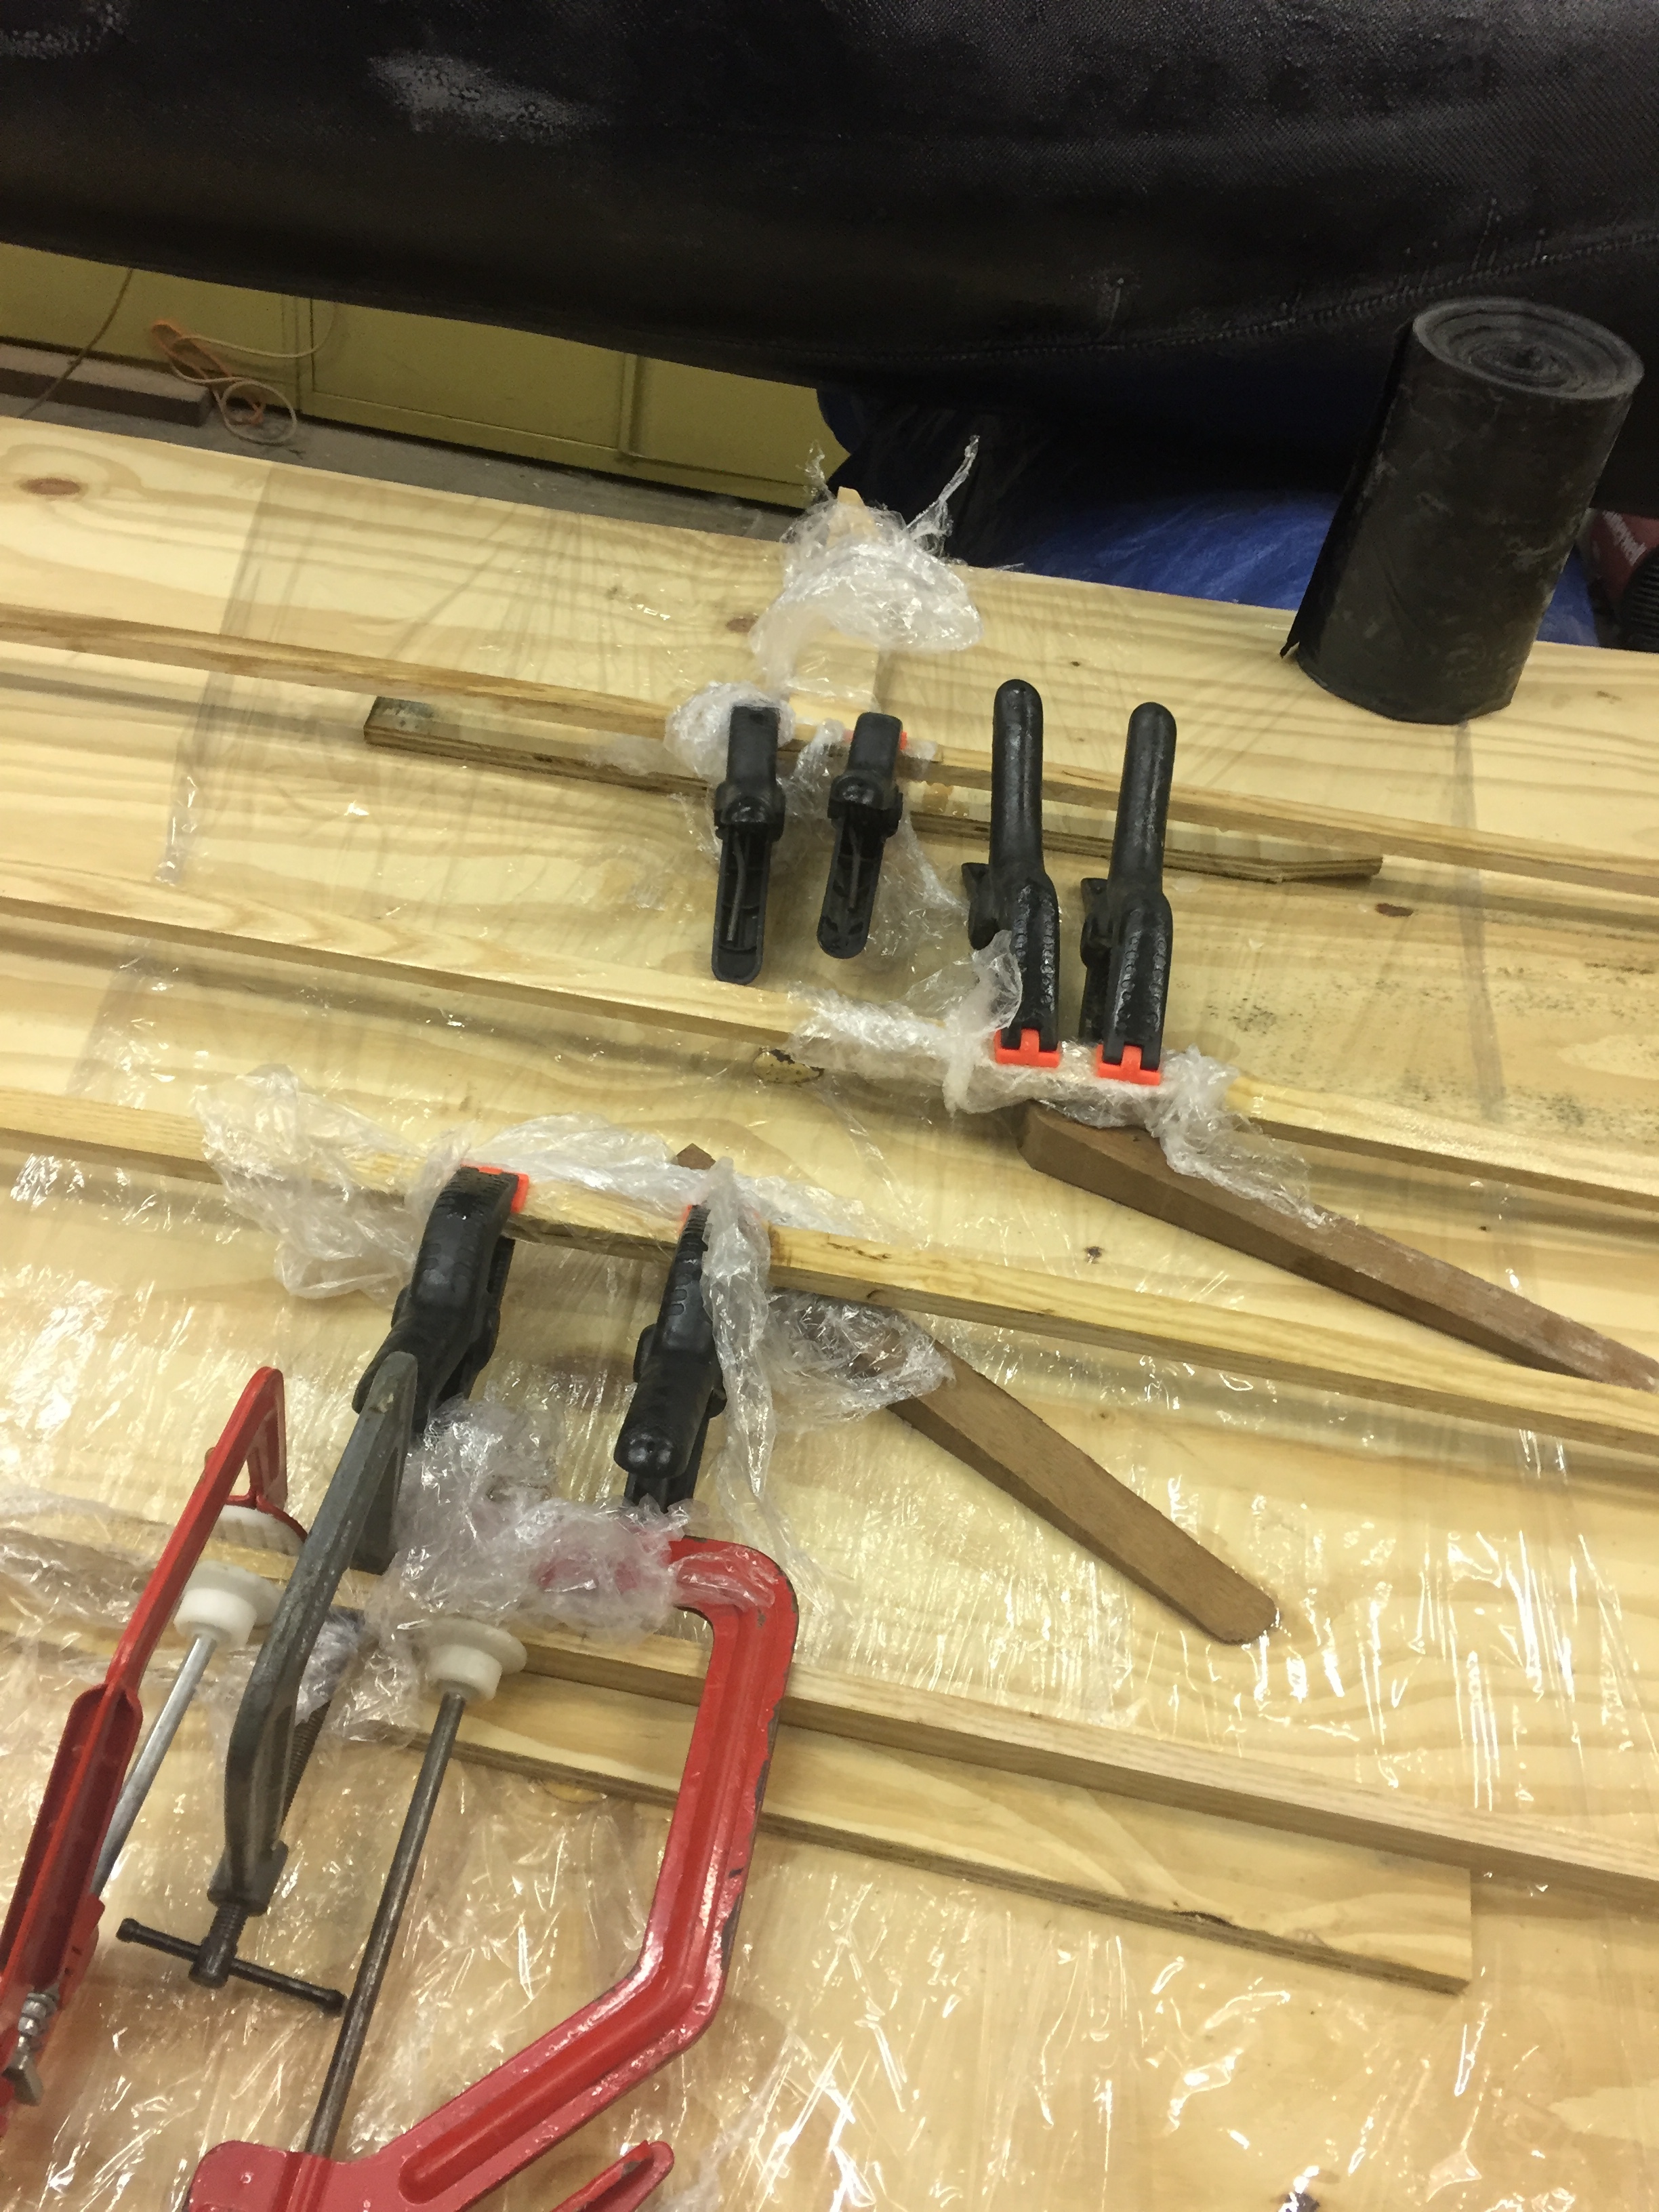
I used ash – the conventional choice now that it’s impossible to source mahogany sustainably. There’s great advice on why this is a good choice on the Mad River Canoe website. The longest strips I could find were 4.8m long so I had to scarf them together. To do this I made my own wood glue using epoxy and cellulose fibres in about a 50-50 mix by volume.
I treated them with epoxy and then varnish and then screwed them onto the boat. To get them level the right height I used t sticks (little cruciforms) that nested in the keel and showed the gunwale height on both sides. I screwed the ash strips on with 25mm screws alternating sides at 6 inch intervals. Towards the end of the boat I couldn’t screw from the inside so put three consecutively on the outside.
With that done I trimmed the excess off with a jigsaw. I didn’t give this enough care and gouged some sections of the gunwale. I then installed the yolk (ash, made by Hou Canoes) and a couple of carrying handles out of 1 inch Pine dowel rods.


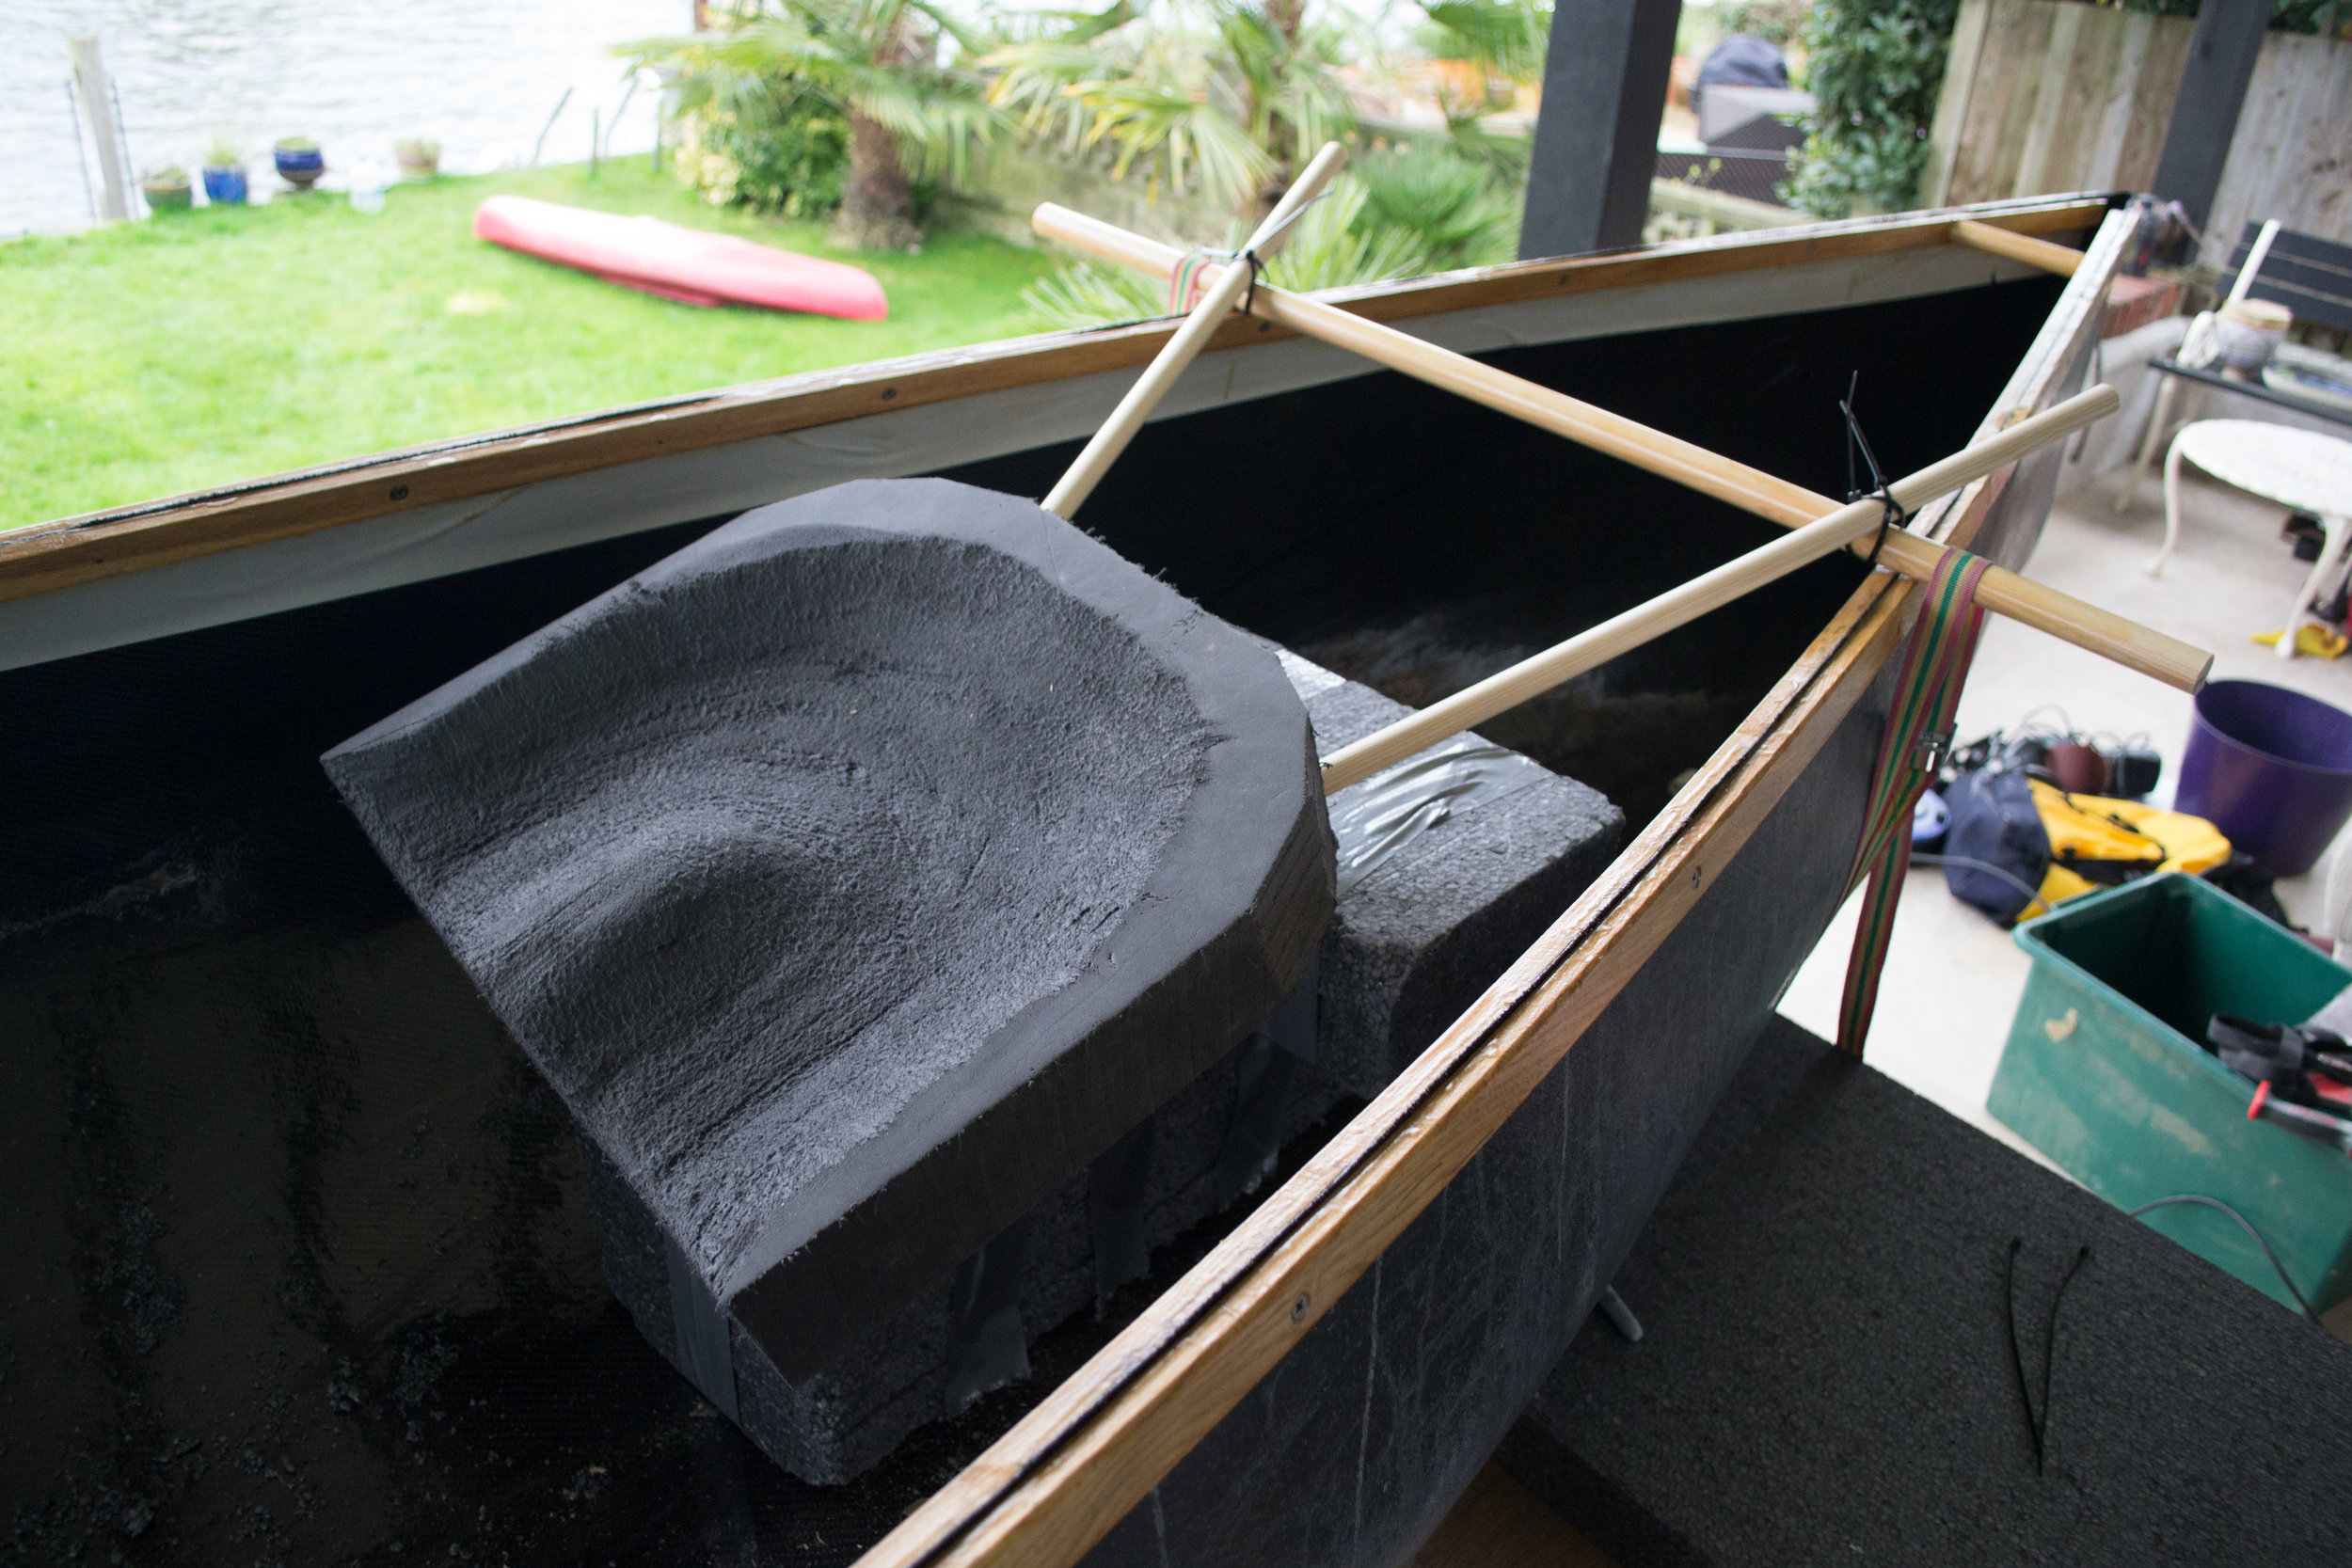
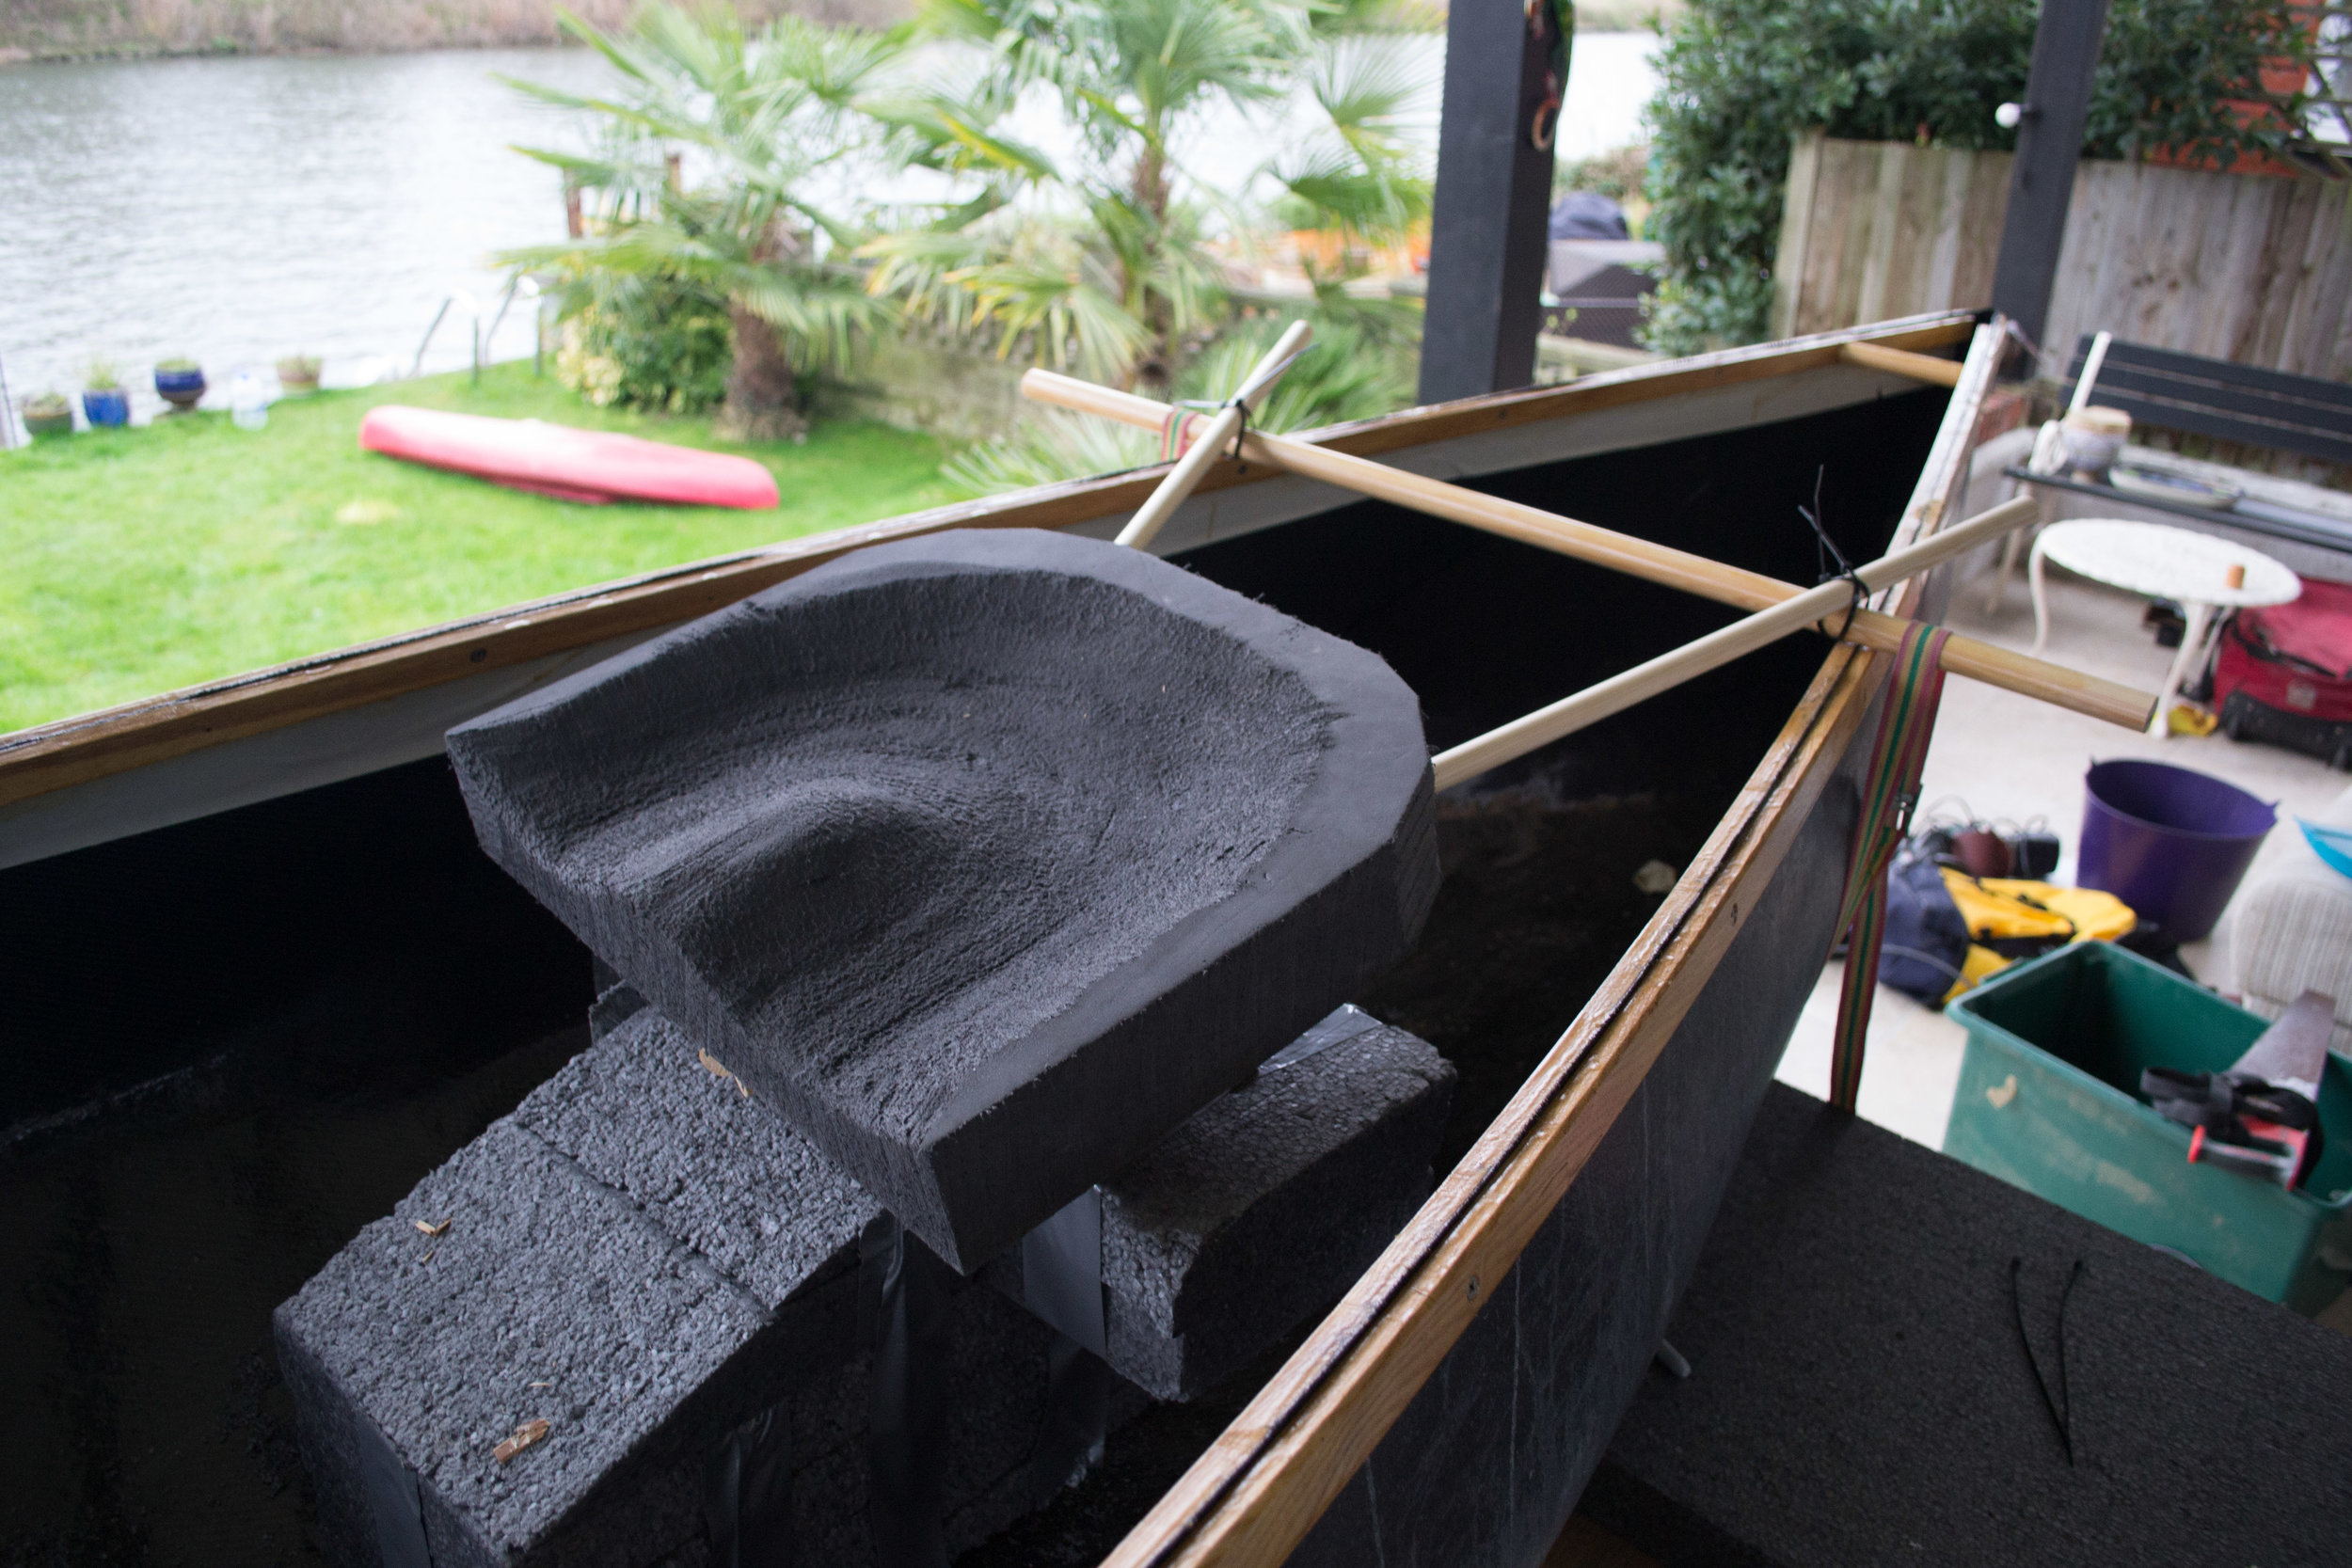
The final thing to do was make a seat. I bought a 16 x 18 x 3 inch minicell block from my local paddling shop and carved out a bum shape into it. I found this surprisingly hard to do and ended up using a woodsaw and a surform file. I then sanded it with some 120 grit to give it a smoother finish.
I had a few design requirements for the seat. it has to be adjustable in both height and angle so that I can sit or kneel on it. It also has to lift off the hull so I can sleep in the boat in emergencies. I'm still playing with my design but it involves two pivoting arms attached to a dowel thwart. The seat rests on a foam block, and is laterally connected to the boat via the two arms.
I'm playing around with its front-back positioning. There's a problem - to fix the seat's position you have to get out there and experiment, and to get out there and experiment you have to fix the seat in! As you can see, it's not permanently attached yet. I'll trim the rods and screw them in when I'm happy with the positioning.
Building my own boat has been a great experience. Physics graduates like myself often get turned out of university with criminal lack of engineering know how and this has been an opportunity to round out those weaknesses. I've also learned a lot about paddlesport and boating in general - subjects that I've always been passionate about.
The boat's not perfect but it was never going to be. I'm really proud of my attempt and would fully encourage anybody else to do the same rather than buying their own. For a start it's cheaper and you get to customise it to what you want. When you learn to build a boat you also learn how to fix it as well as others - an important skill in a world where we can be so separated from the production of our equipment. If you fancy building your own or just want to know more then please get in contact, my email can be found by clicking “academic CV” at the top of the page.


I went on to have a somewhat disastrous expedition in the canoe, where I tried to paddle it from my house in London to Istanbul. Photos above from the nicer parts of that trip.
In August 2020 I sought redemption by sailing the canoe across Scotland in three days (Fort William to Inverness) with my pal Tim. We paddled both moving water sections and the boat held up well despite some big hits on rocks. We also had a lengthy section of sailing down Loch Ness with an average speed of 8 kph and a max speed of 12!